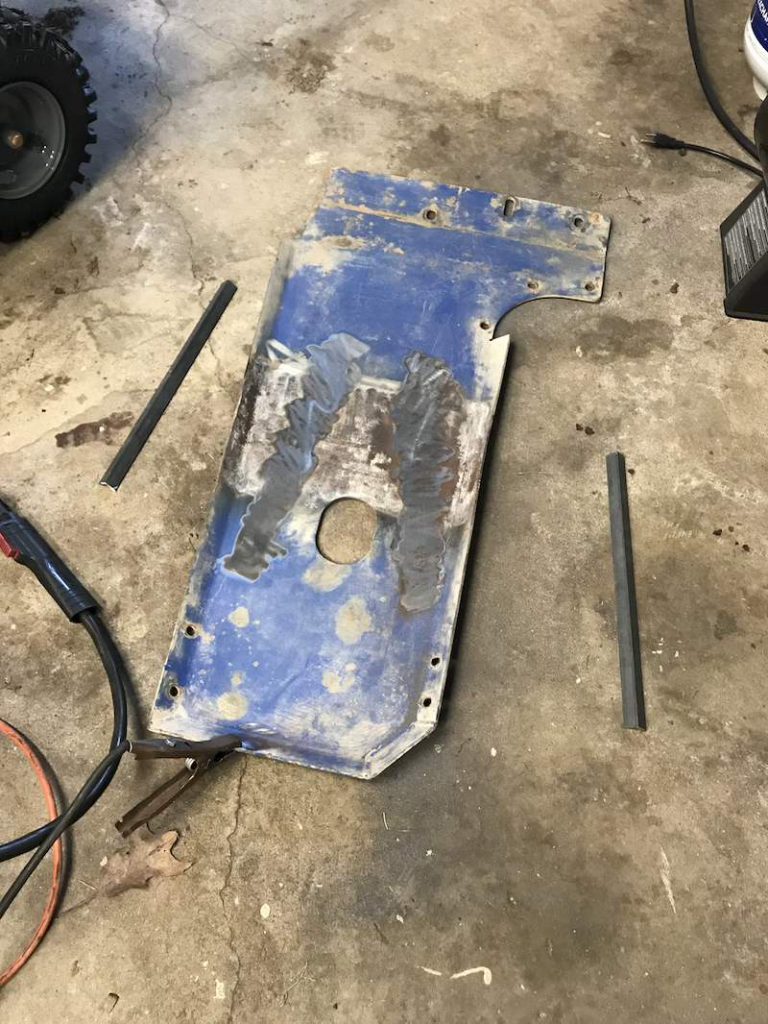
My engine skid has taken quite a beating over the years. It had a well defined frown in the steel. I used the oxy-acetylene torch to heat it up and hammer it as flat as I could get it.
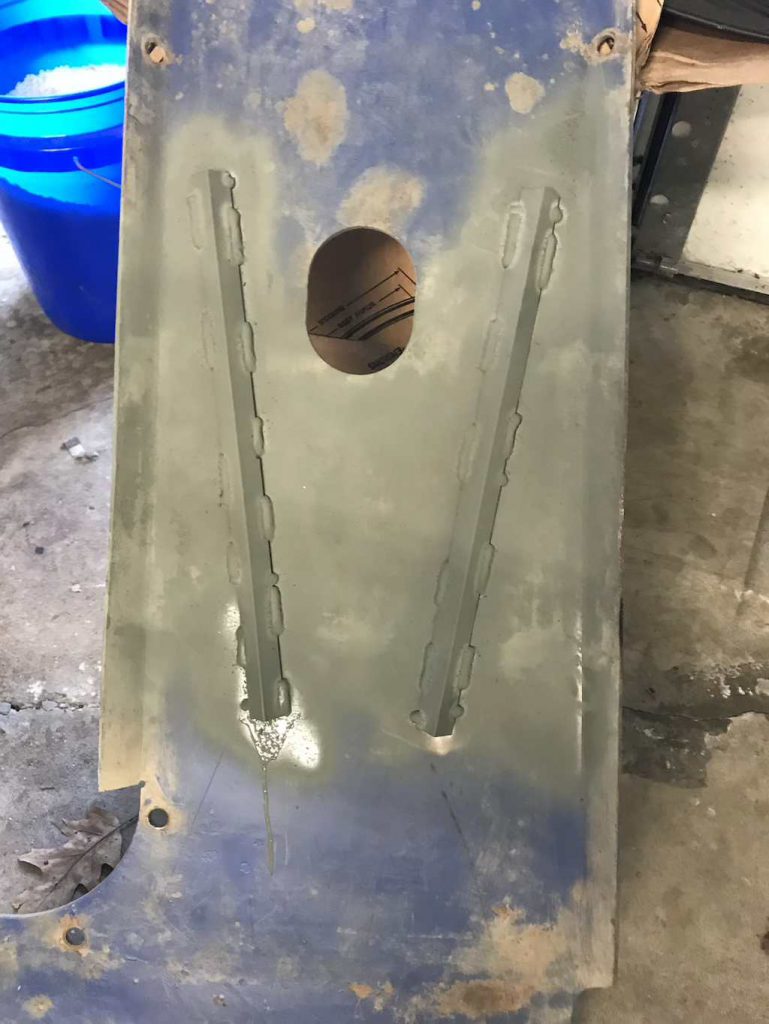
To try and prevent future warpage, I took some angle iron and welded it to the top side of the skid. It won’t interfere with anything, and should keep it a bit flatter for a while.
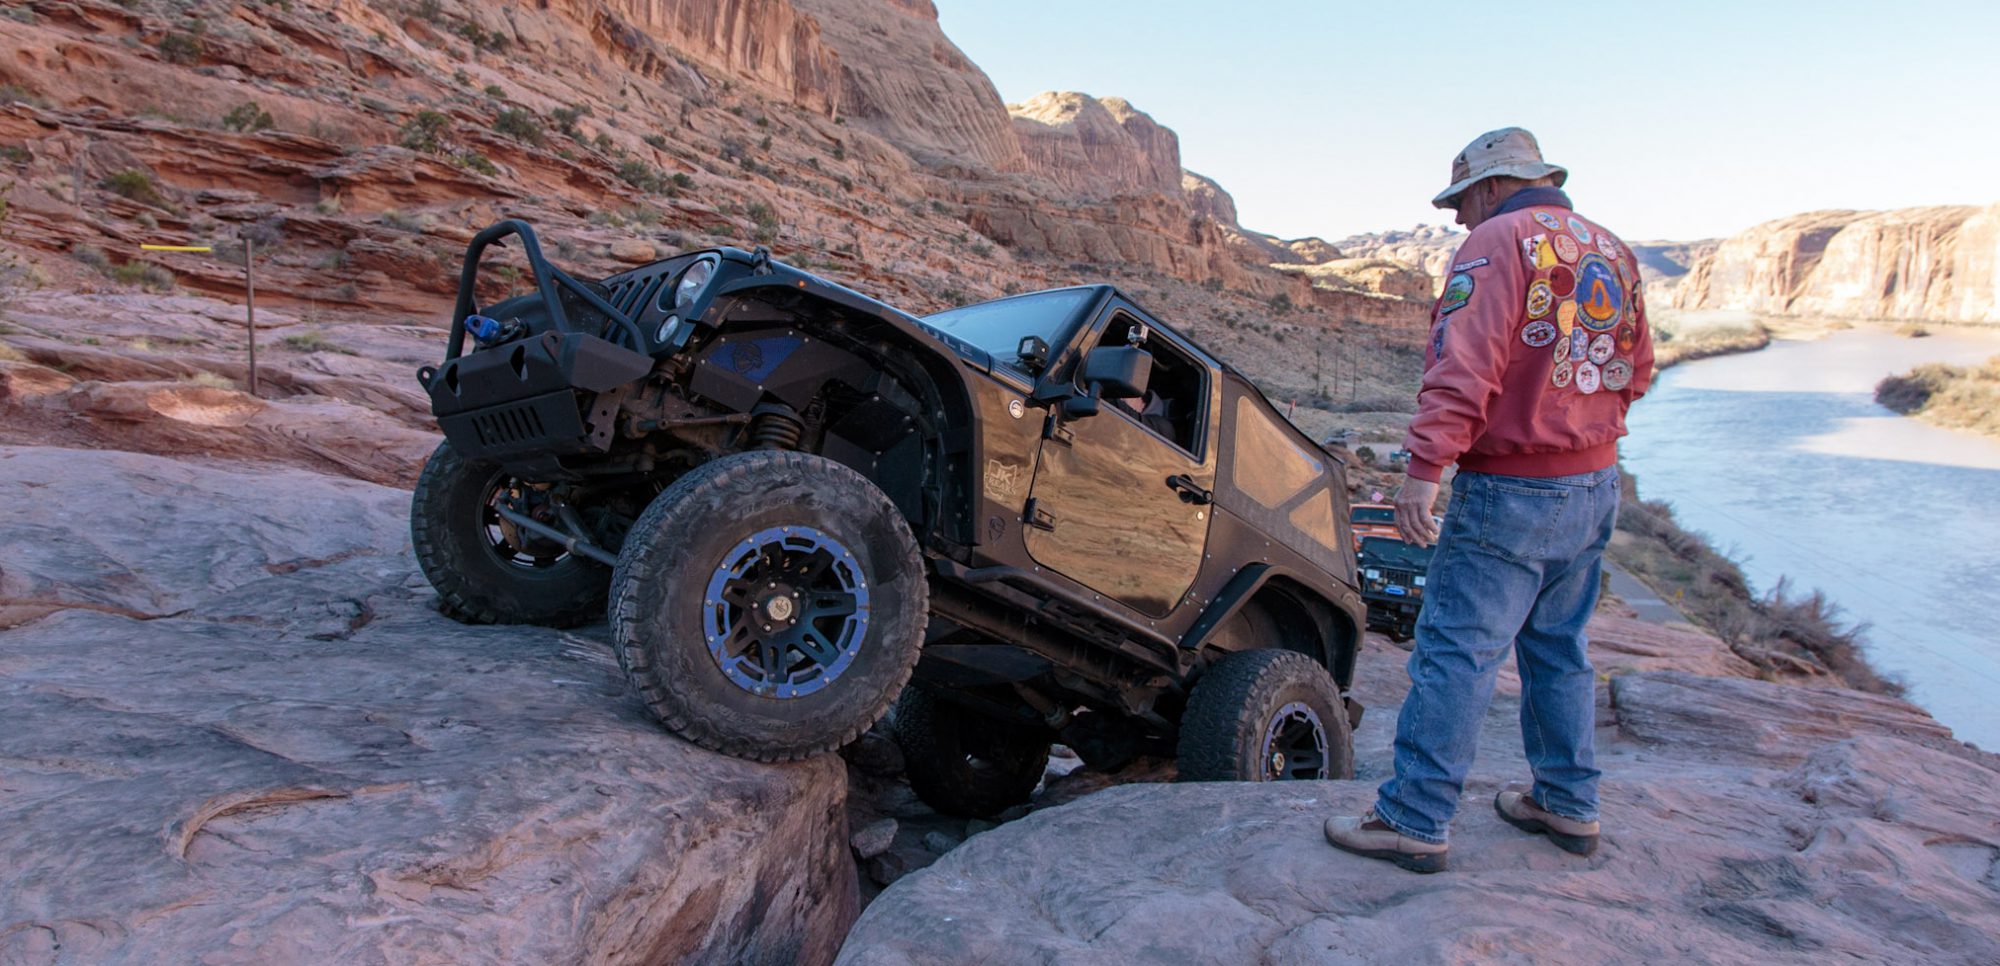
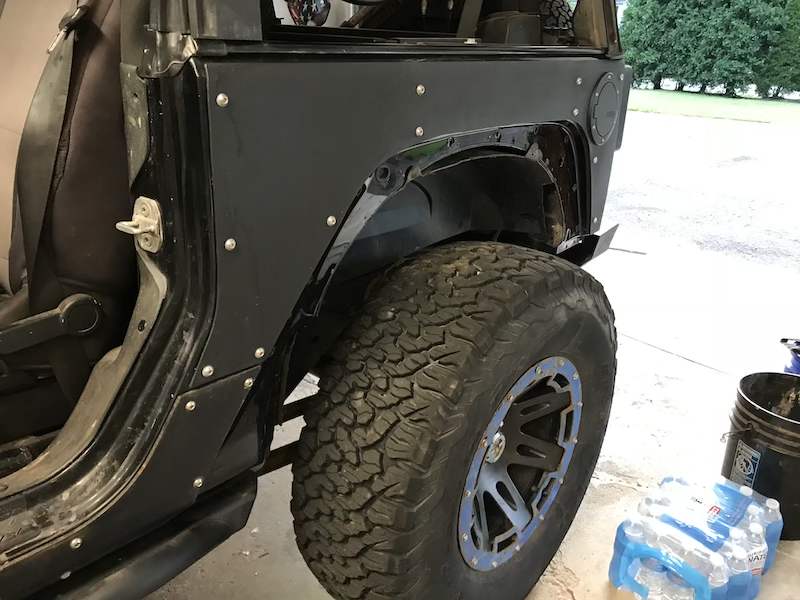
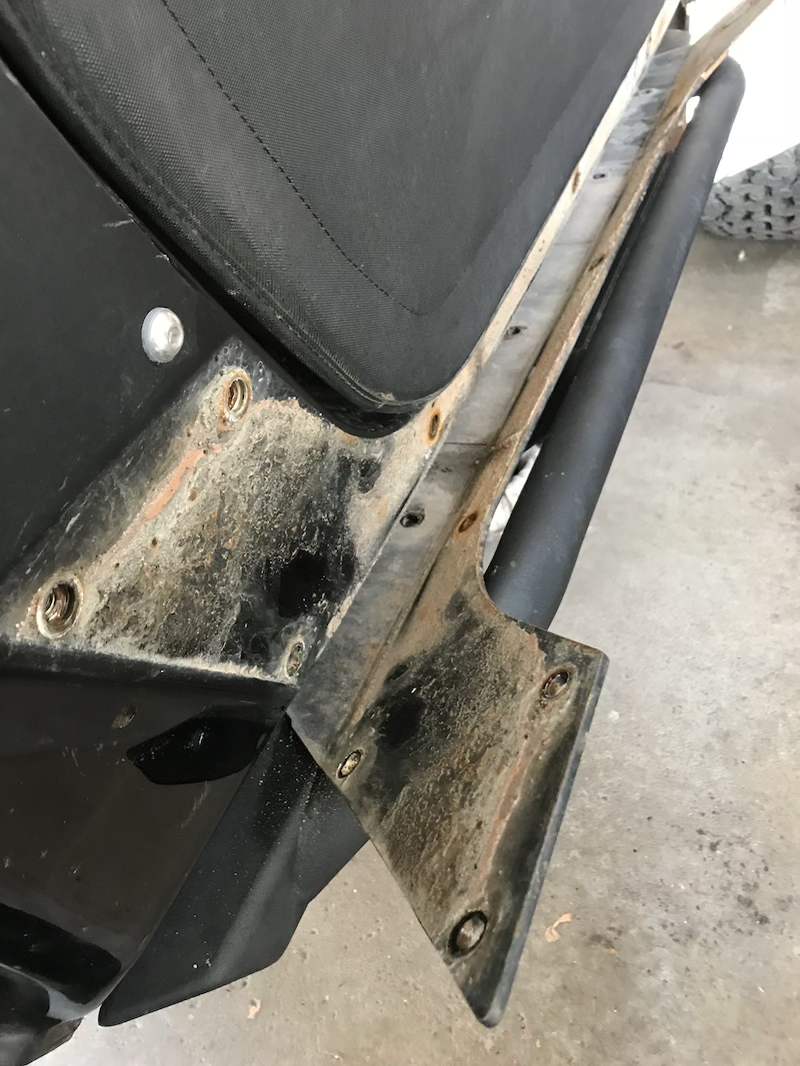
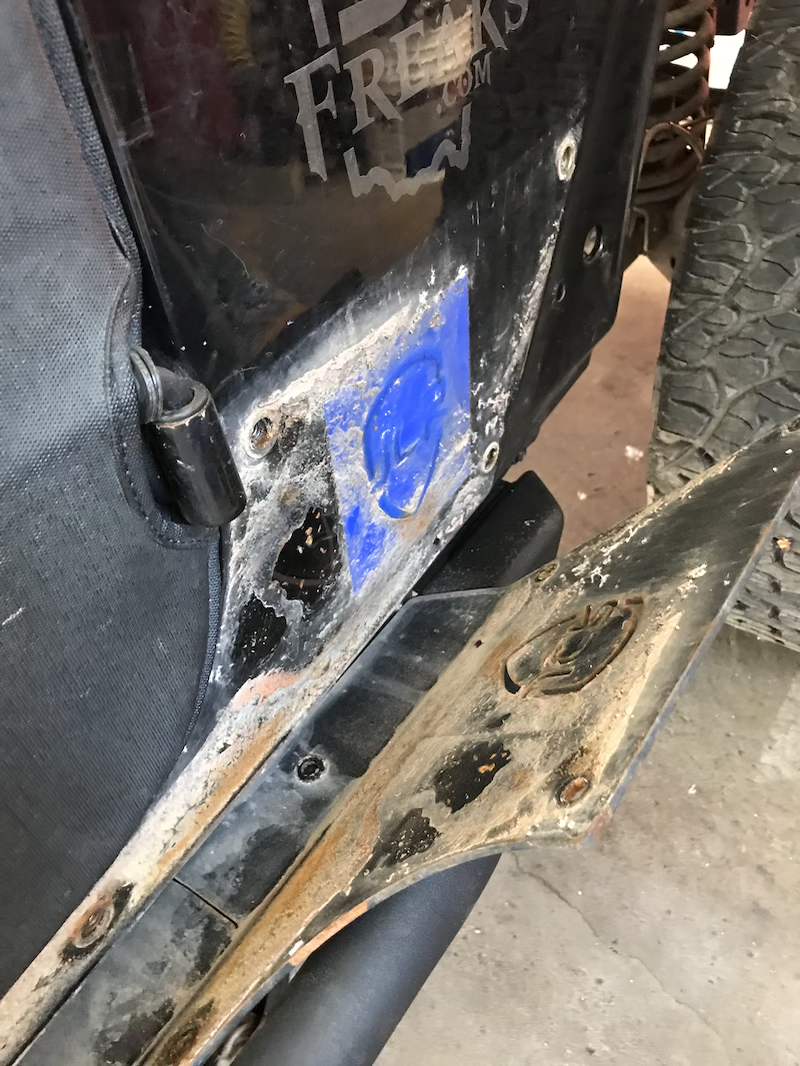
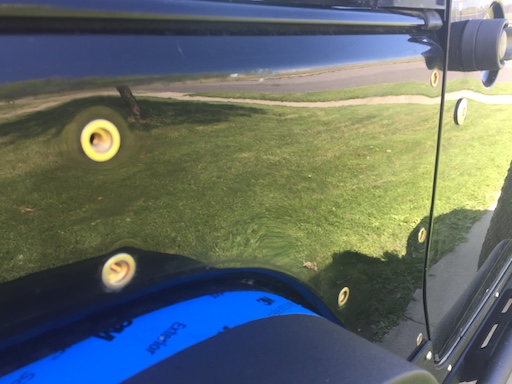
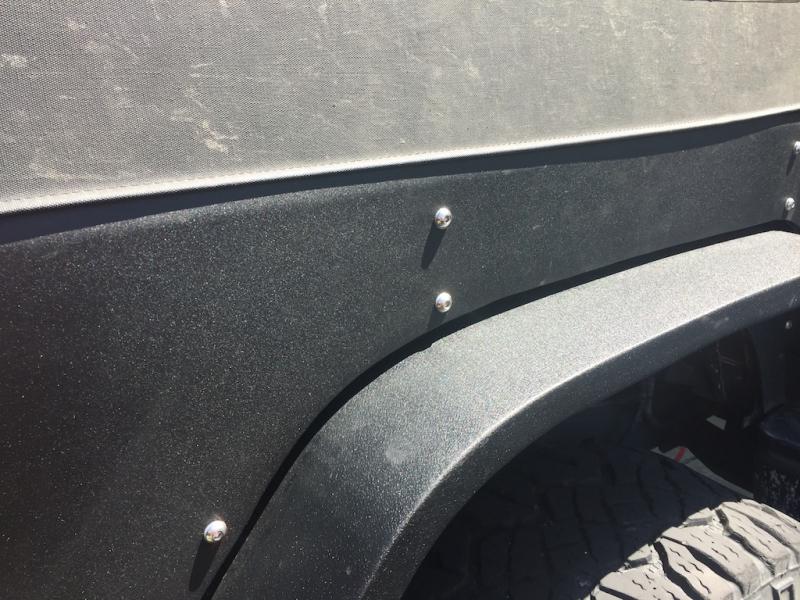
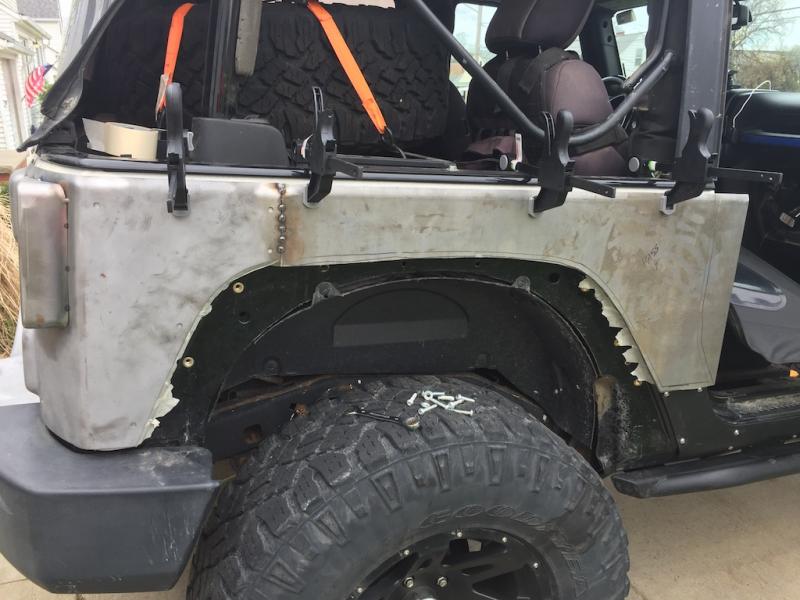
I’m sure all of our mothers harped on us to clean behind our ears. Decided to remove some of the armor on the Jeep and clean behind it. Dirt can get back there and it’ll act as an abrasive and wear the paint. Lose too much paint, and I’d be inviting rust.
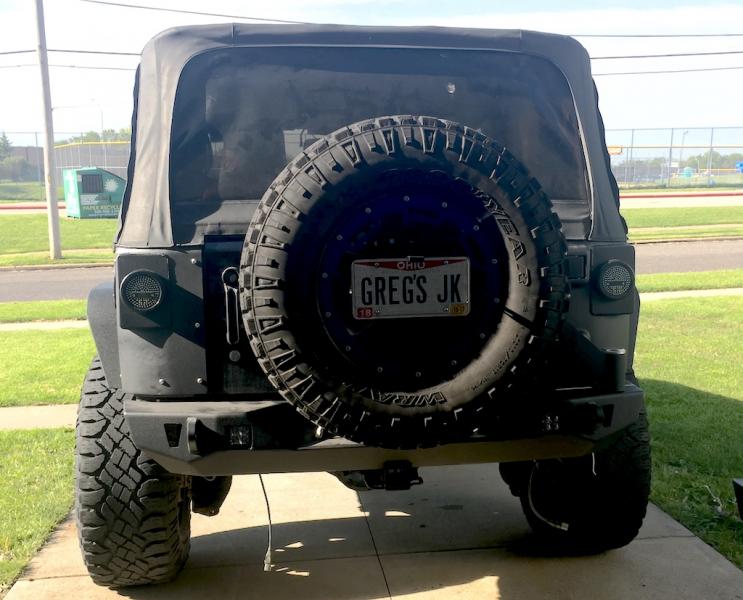
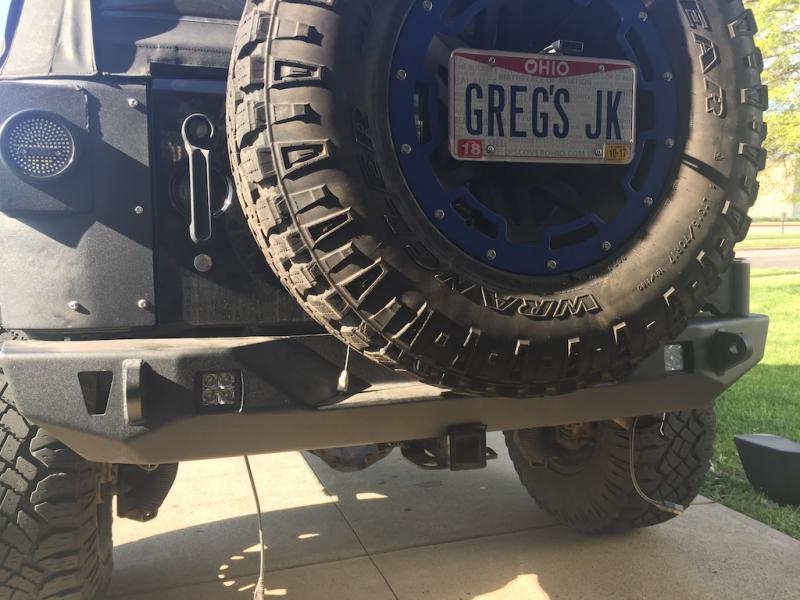
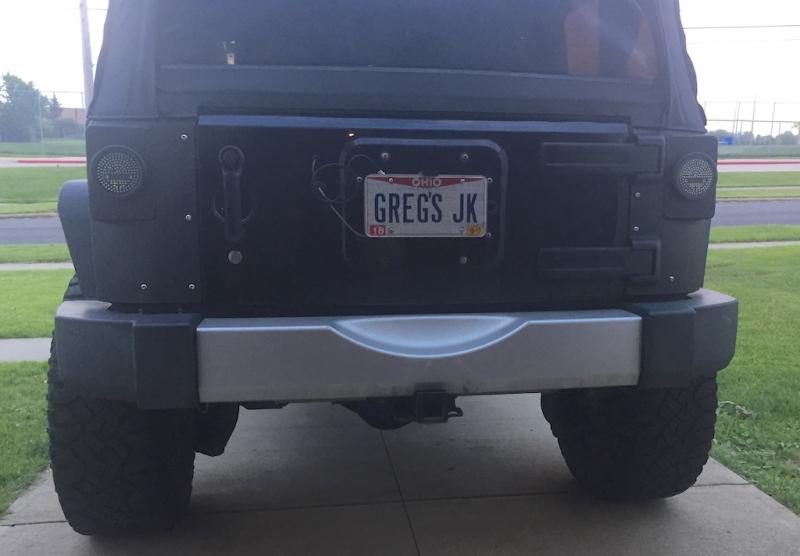
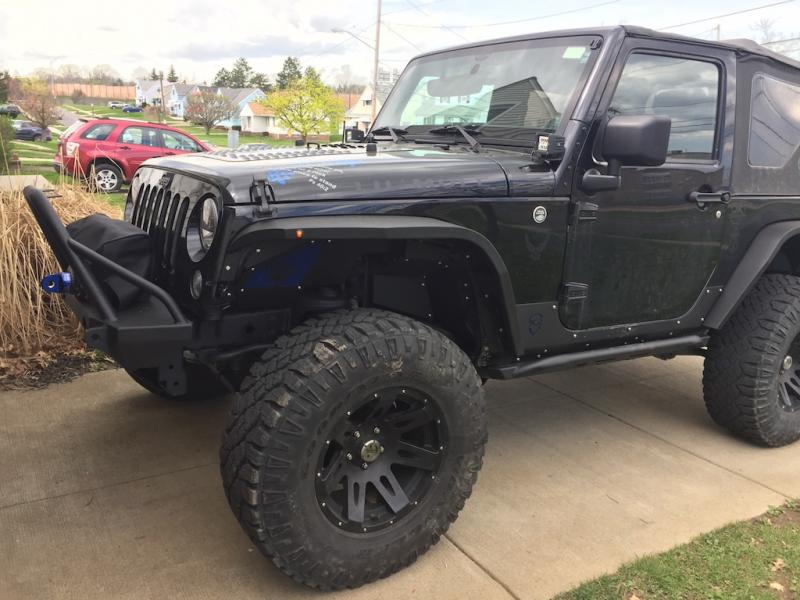
Got the rear bumper and tire carrier back on. Replaced some of the hardware. I also replaced the bearings and the oil seal in the tire carrier spindle. For what they cost, why not.
I also mounted my DIY license plate bracket. It removes very easily so the spare can be taken off if needed.
I also got the roll bar padding back on and the Spider Webshade back on (no photos).
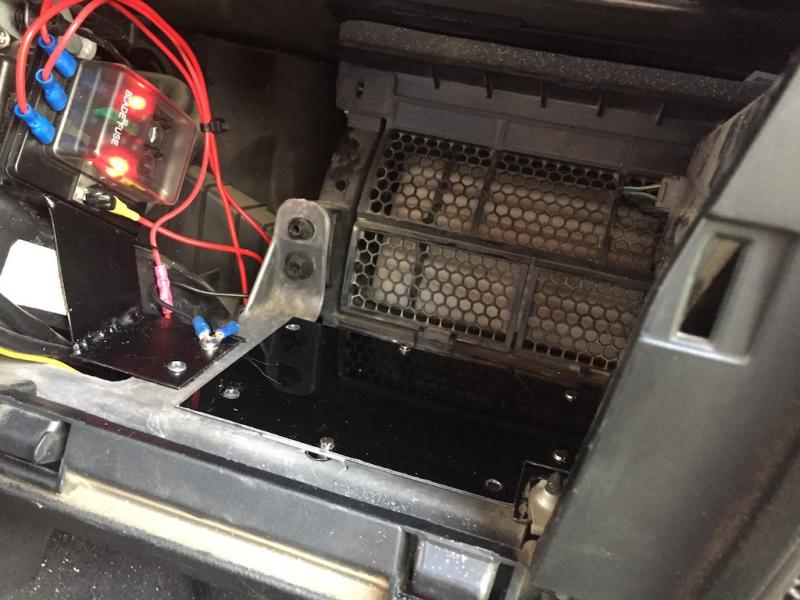
Ran the wires from the GMRS radio down the middle of the cage. The power leads run behind the glove box. I wanted to put a fuse panel back there, so I made this bracket from some plate I had in the scrap bin.
Took some of the sheet metal I had cut out of my hood when I put in the louvers and mounted the CB and USB power supply to it.
Tucks up nice and neat out of the way. And the glove box still fits!
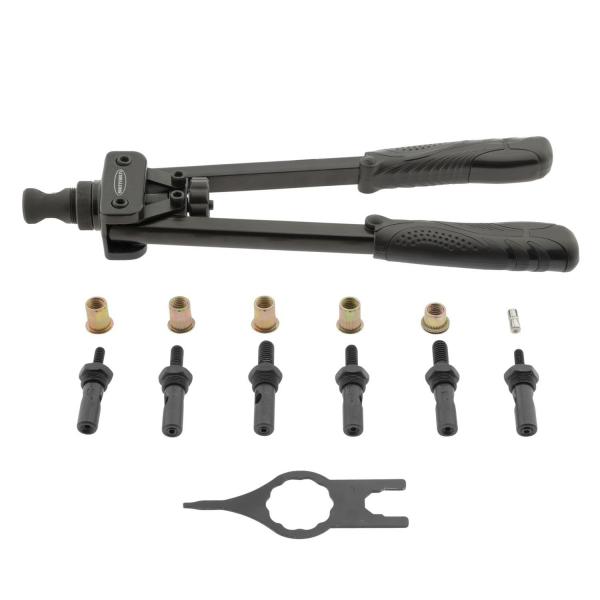
Over the last month or so, I’ve put in over 60 of these. I think I got the whole nutsert thing down.
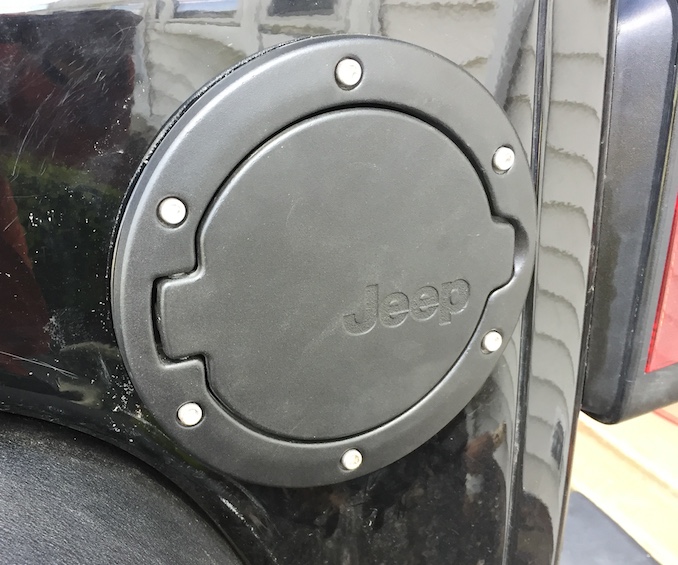
Everything went as expected. The fuel filler fits perfectly in the hole for it.
Got the tail lights wired up. I really like how this all turned out, if I do say so myself. The trail tails are really bright. I put a large wattage resistor between the ground and the turn signal, however, to keep the computer from thinking the light is burned out.
I am so glad I went through the trouble to have that small bend placed at the top. With the soft top on, it covers the edge of the armor.
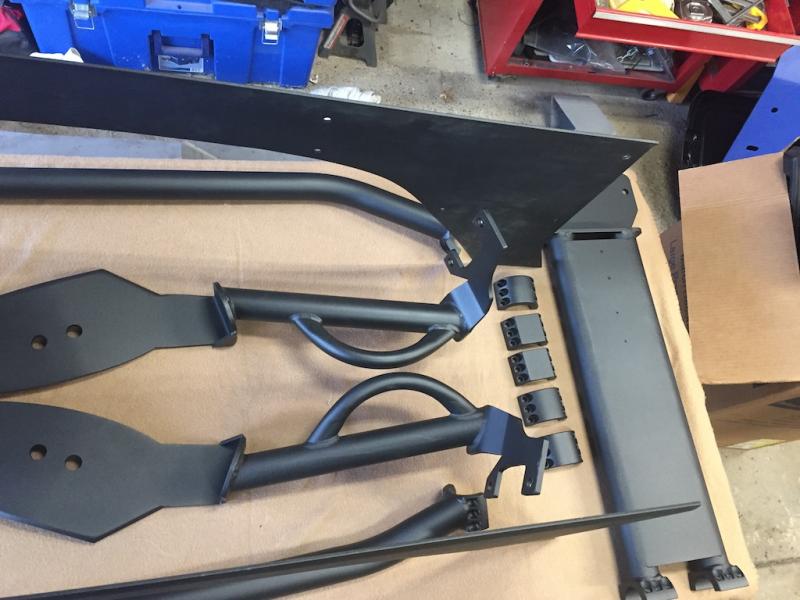
I got the cage and corners back from the powder coater last week. SK Finishing in Lorain, OH did a really good job on these. Started with a zinc rich primer and then the top coat of Carbine Black Textured.
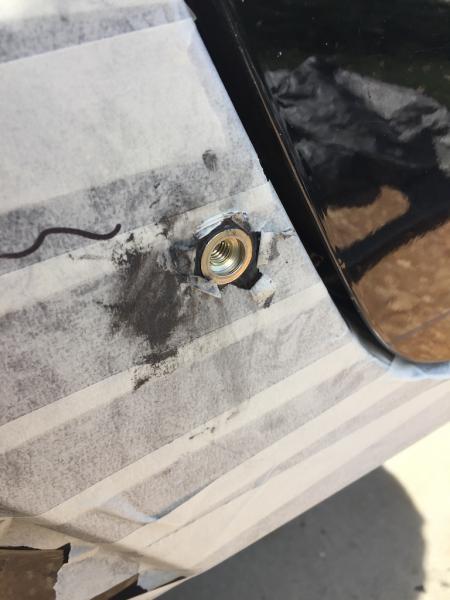
Picked up this Jeep branded fuel filler spout from a jeep forum. Removing the old one gave me an opportunity to smooth out the wave that the sheet metal sustained when my old Bushwacker flare was jammed into a tree.
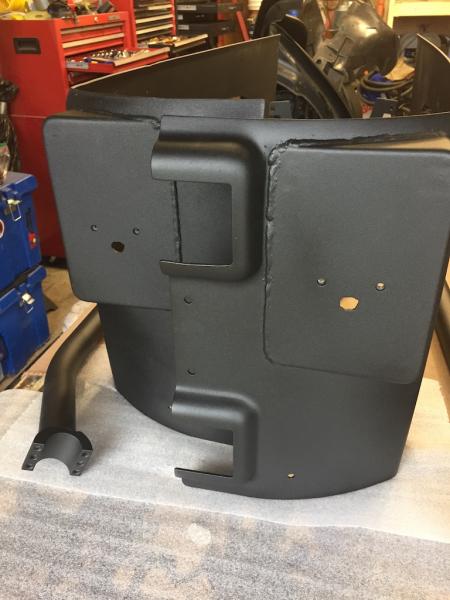
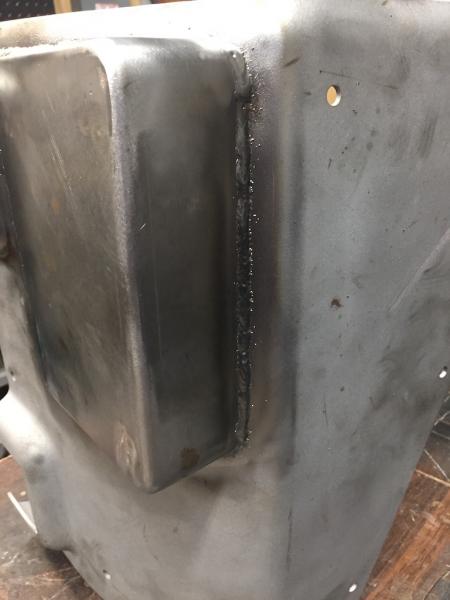
Also picked up this JCR Offroad transfer case skid. I installed it and reinstalled the JCR engine skid I had removed before winter. I installed a small spacer between the cross member and the skid. With the Teraflex exhaust spacers, I have to separate the skids from the exhaust loop or it will rattle.
I think removing the skids each fall and installing back in the spring will be SOP for me unless it becomes a garage queen. NE Ohio salted winter roads are murder on these.
The only thing I don’t like about having a full transfer case skid is I can no longer get to the transfer case side of my drive shaft to grease it. That means I am going to have to remove the transfer case skid every 5,000 miles. Hmmm.
Spent an afternoon and got the cage installed. Took my time. The extra thickness of the powder coat made it a little bit of a challenge, but it went in pretty easy. I am so glad I had these colored black. I was originally going to do them in blue and my wife made a weird face. I took that as a sign.
I had planned on upgrading my climate control to Auto Temp (I have most of the parts) before putting the cage in. Maybe in the fall. It would be nice to have this installed before winter.
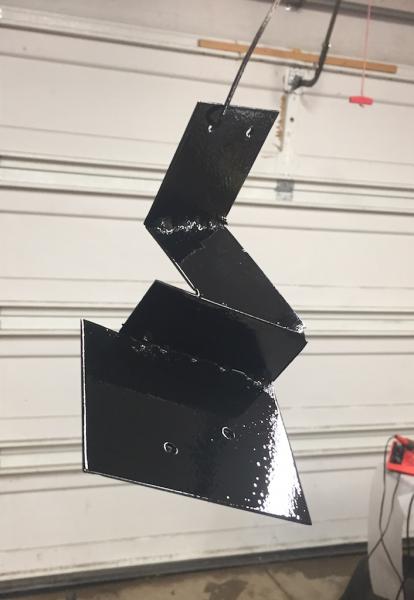
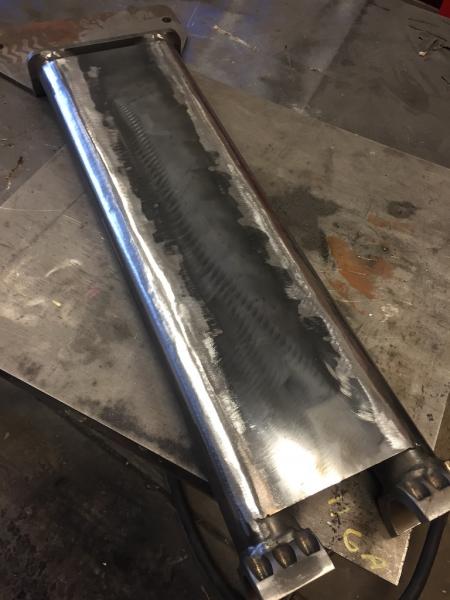
More progress on my Frankencorners. Finish welded the seam between the AEV corners and the extension. Finally got the guts to weld the tail light boxes on the corners. They don’t stand up to anything Andy would do, but I am happy with the result. I had to stop and start a few times, I still have trouble seeing the material when welding. But progress is progress.
I also drilled the holes for the Trail Tails and welded nuts to the inside of the tail light box. This will make it easier if I ever have to remove them, I won’t have to take the corners off.
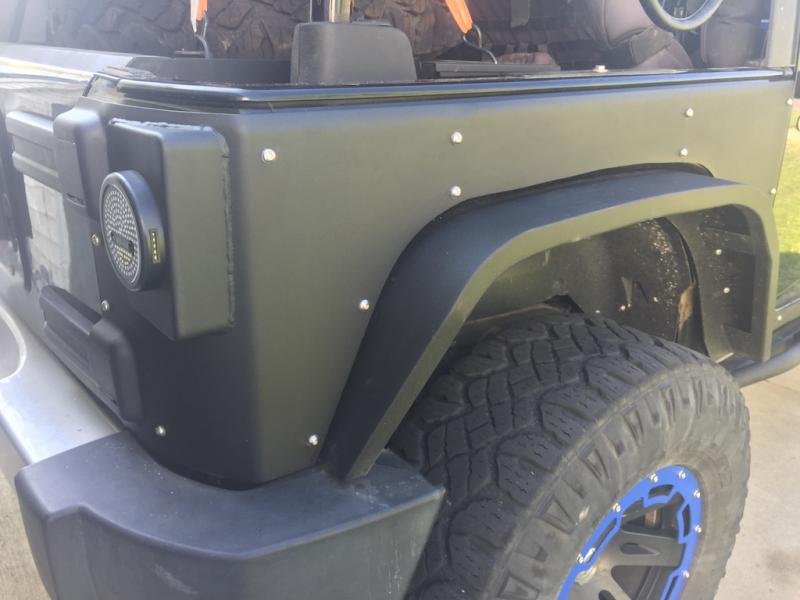
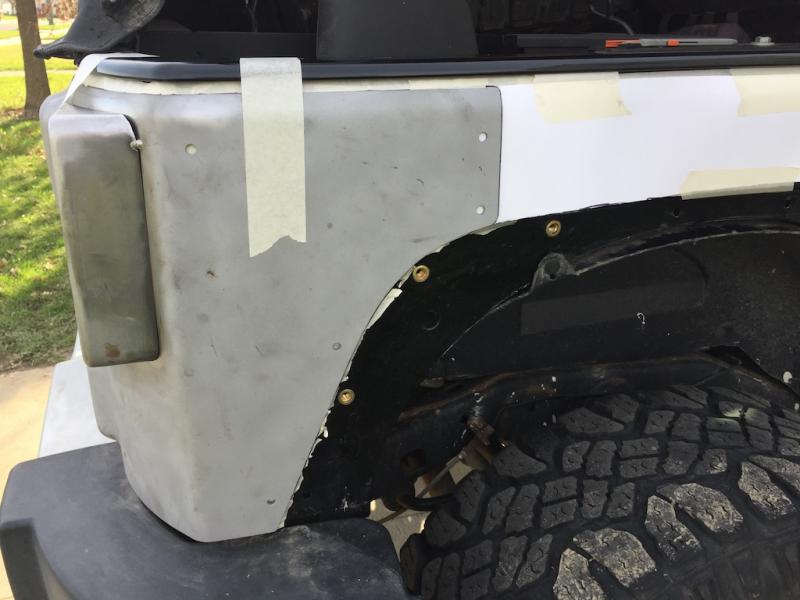
Made some progress on the corner armor. Picked up the steel from my supplier. They also put a small bend/radius at the top of each of the long ends that matches the bend on the AEV corner. I used the template I made to mark out where I needed to cut and cut them rough. Once tacked up, I could put them on the Jeep to get a more accurate cut line.
Next step will be the finish welding and grinding of the seam, some mounting holes and they’ll be ready for powder coat.
I used a piece of aluminum to make sure the new steel matched up with the AEV corner.
Here you can see the rough cut.
And then the finish cut after I re-installed the JCR rear fender flares.
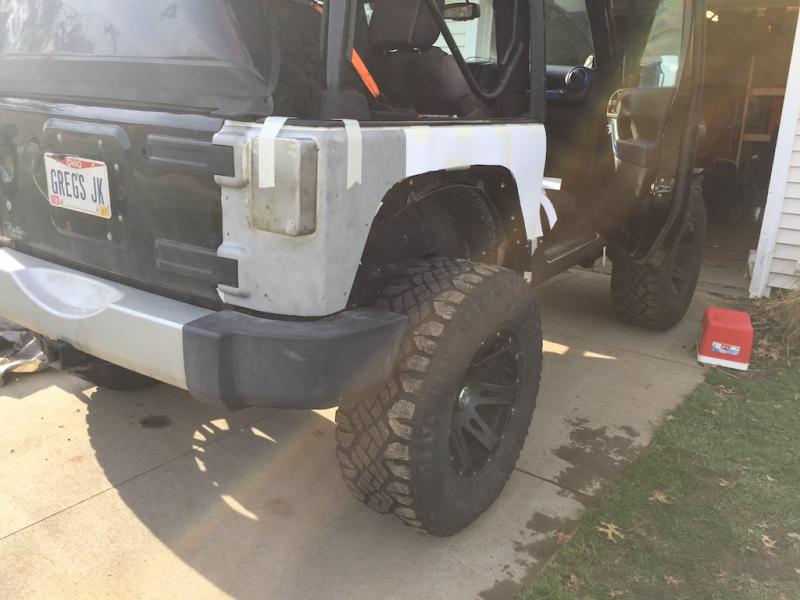
I’ve been waiting to get these finished before I put the rear bumper and tire carrier back on the Jeep.
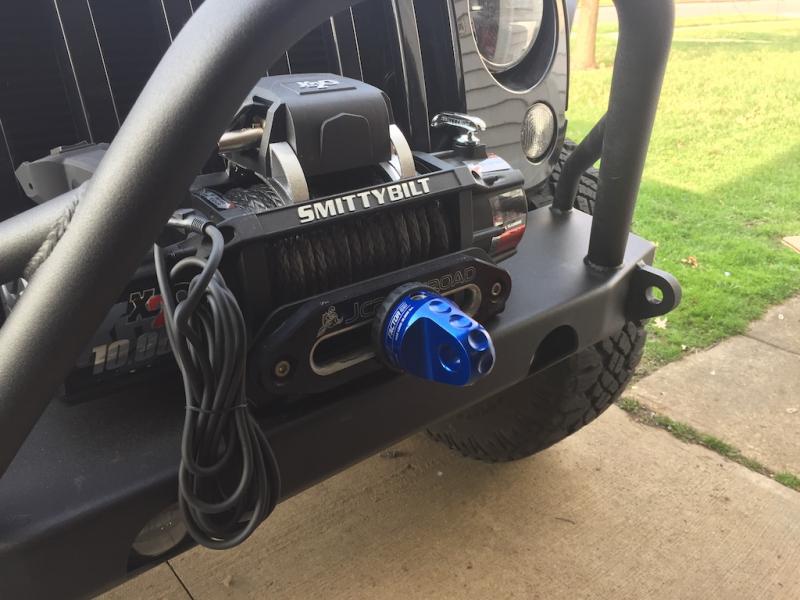
Got the bumper and winch installed yesterday. Added a Factor 55 Prolink to the mix this time. Had issues with my Smittybilt winch. Called them and they sent me a whole new winch. I’m not sure I would recommend this winch again, but the customer service is outstanding.
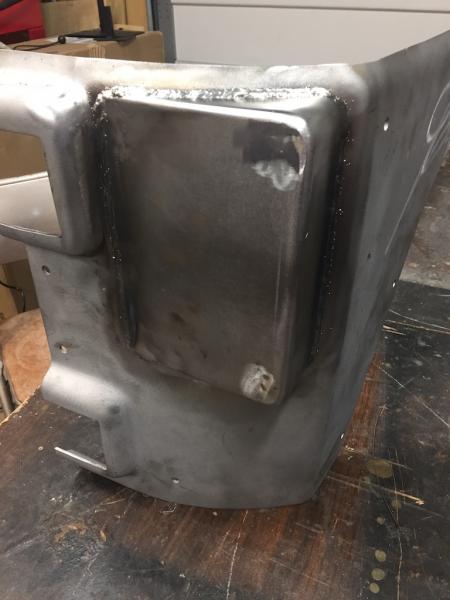
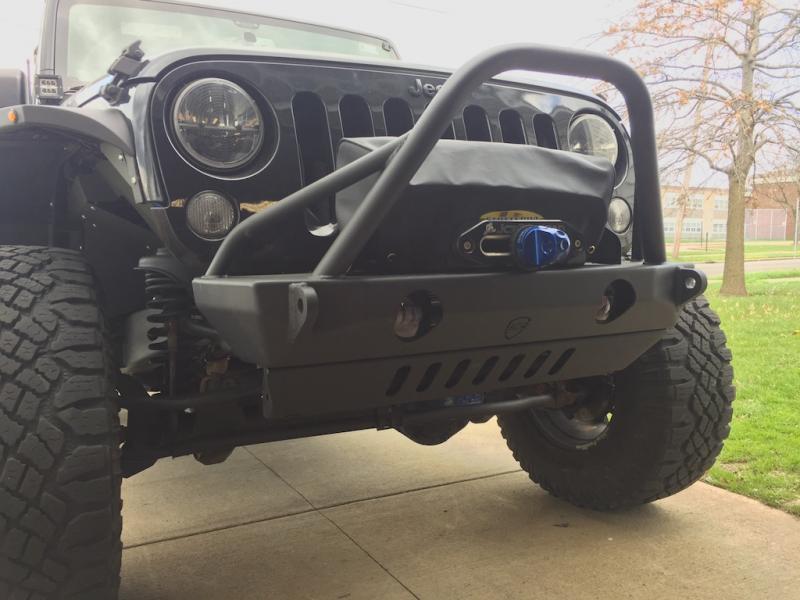
I installed the lower bumper skid today. Both the bumper and the skid were part of what I had blasted and powder coated. The color and texture is a perfect match to the coating from JCR.
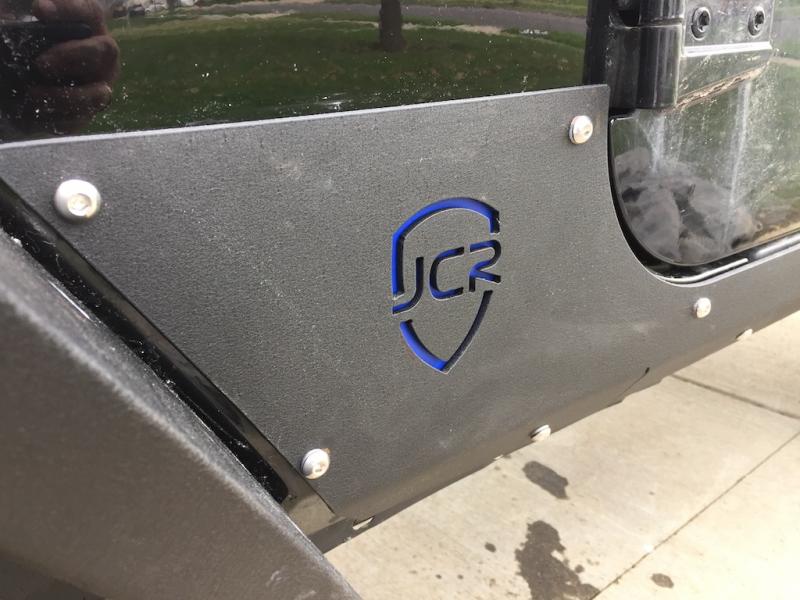
Added a little blue accent behind the JCR logo on the bumper. Hard to see from a distance, but I know it’s there.
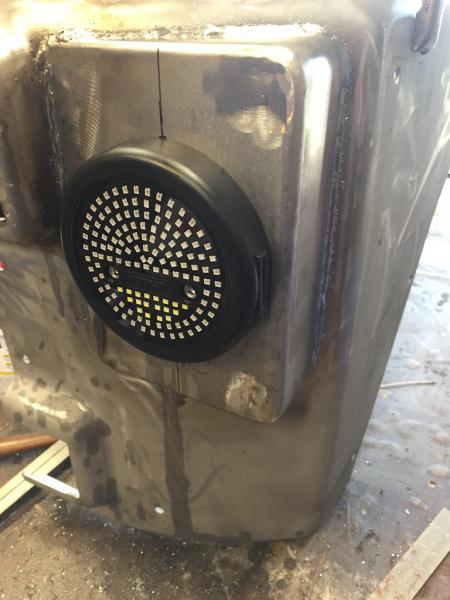
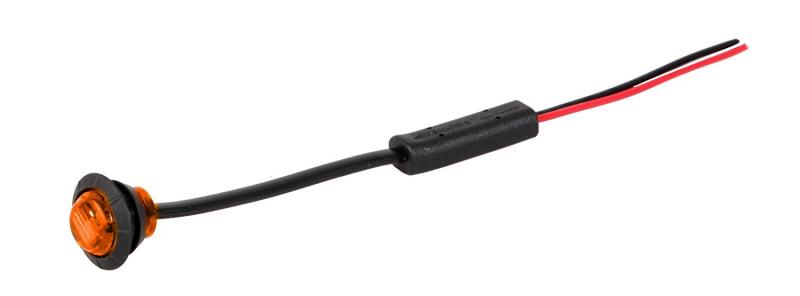
These actually have three wires coming off of them. One ground and two for the LEDs. You would think the black wire was ground, but you’d be wrong. The White wire is ground, the Black wire is for the parking light and the Red wire is for the turn signal. The Jeep should be stock with this feature. I tied these wires straight into the front turn signal wires. The OEM marker light plug was removed. On the Jeep turn signal lights, the black wire is ground, the middle wire is park and the wire furthest from the black wire is the turn signal.
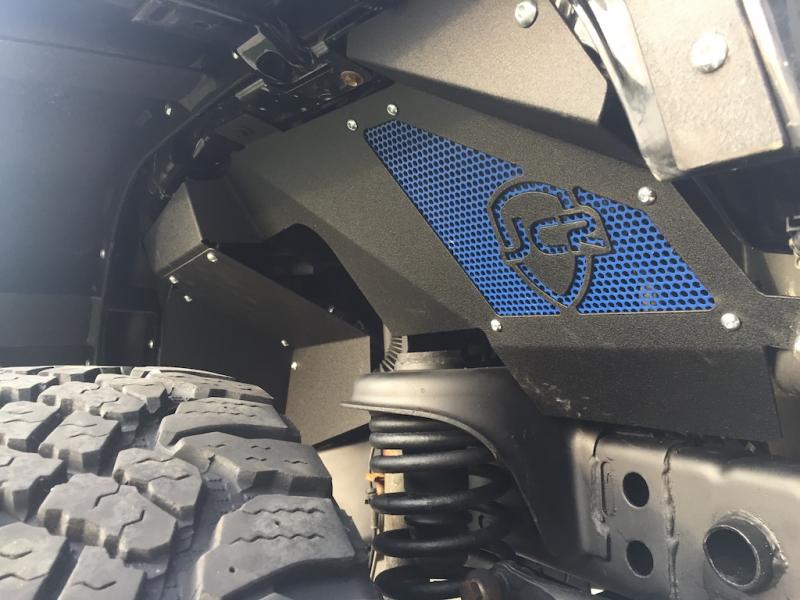
Finally, the JCR fender liners. I painted the mesh blue before installing it. These were a little challenge to install. You either need 10″ long fingers or a really long and crooked wrench.
Getting closer and more ready for Freak Fest daily.
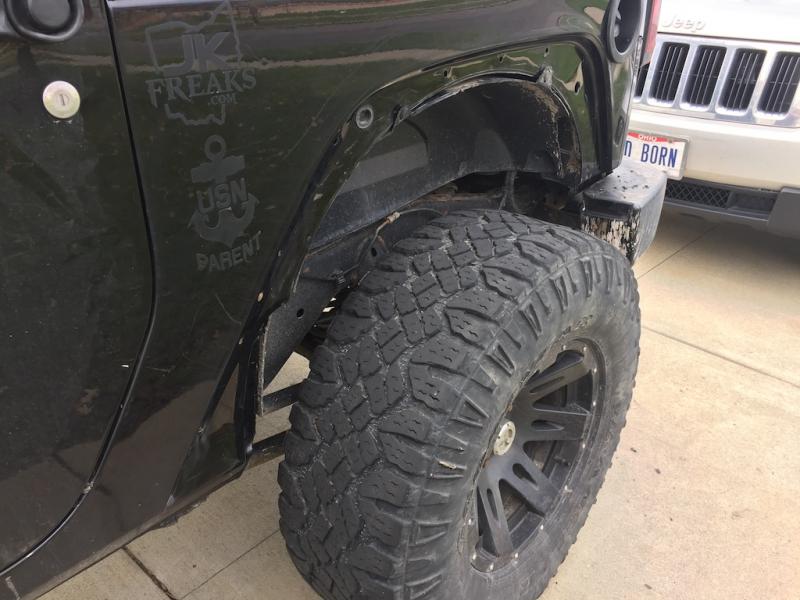
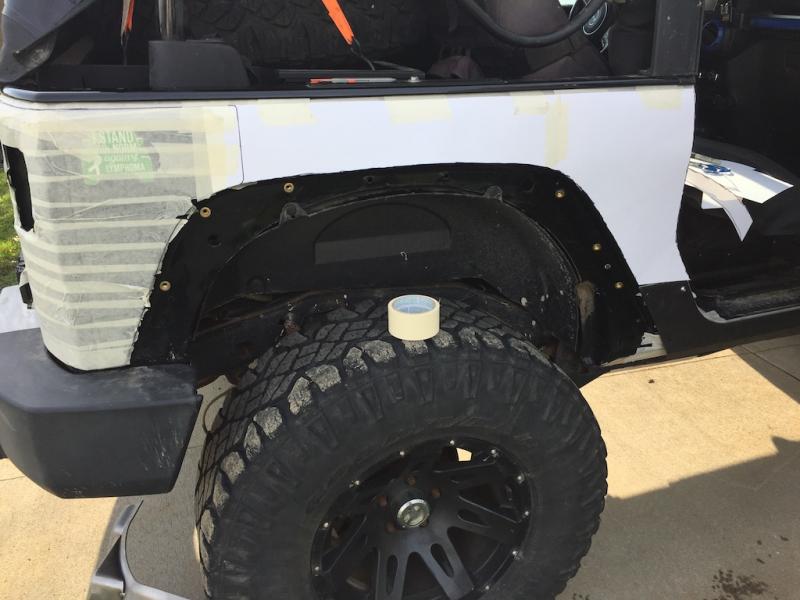
Made some progress on the Jeep this week. Took the rear flares off in prep for getting the corner armor done. Looks weird.
I have all of the cage pieces out now and they are ready for powder coat. But it was bothering me that Rock Hard 4×4 doesn’t finish weld the overhead bar.
I decided to place a couple beads of weld material and grind it smooth. I like it much better. I also tapped the plate for a couple of speakers that will be mounted for the GMRS and the CB radios.
I needed to get the JCR Offroad rocker armor installed before making a template for the rest of the corner armor.
I had bought one of these nutsert tools by Smittybilt from 4 Wheel Parts. Well worth the money.
They aren’t as scary as I thought. LOL.
But no matter how hard I tried to get the nutserts in exactly the right spot, there were always a few that seemed out of place by just a hair. I used a tungsten carbide bit in a rotary tool to adjust the location of the hole in the armor. That bit makes a whole bunch of little tiny needles. They get everywhere. I then touched them up with some paint. All of the bolts had anti seize applied on them.
I put a patch of blue decal material behind the JCR logo to add a little accent.
I could then spend some time making a template for the extension of the corner armor. I ordered the steel and asked for them to bend the edges to match the AEV corner.
Lastly, I spend some time getting the JCR fender flares mounted (no pictures yet). The fronts are mounted, and the rears were mounted temporarily. I still have to wire up the front marker light and install the fender liners. The rears will go back on and come off repeatedly while I am fitting up the corner armor.