
How to build a workshop in 10 simple steps.
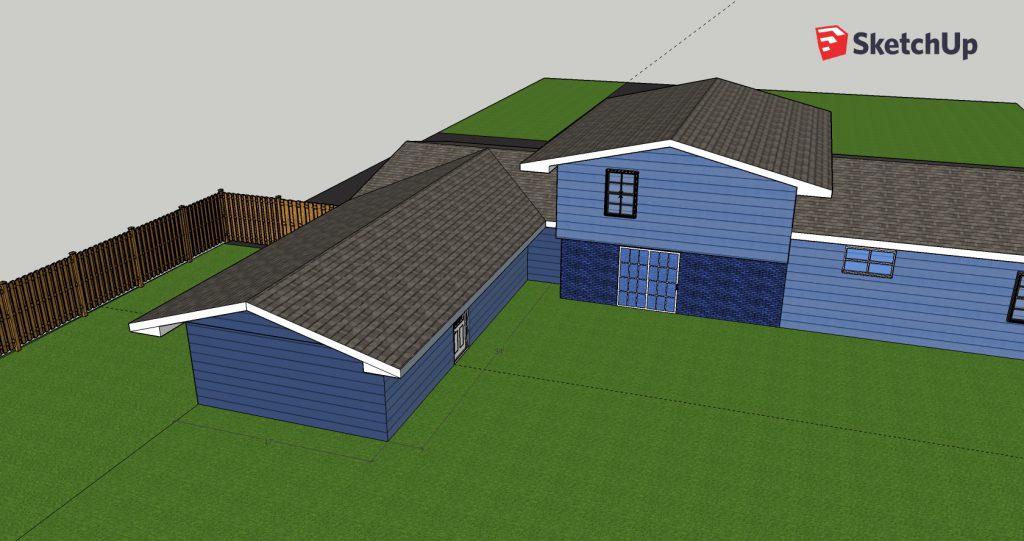
Step 1. Design the shop
I started with SketchUp – a free online 3D modeling program. I first created the house and garage, the figure out how big I wanted the shop. I took these to an architect that created plans and drawings I used to get the building permit.
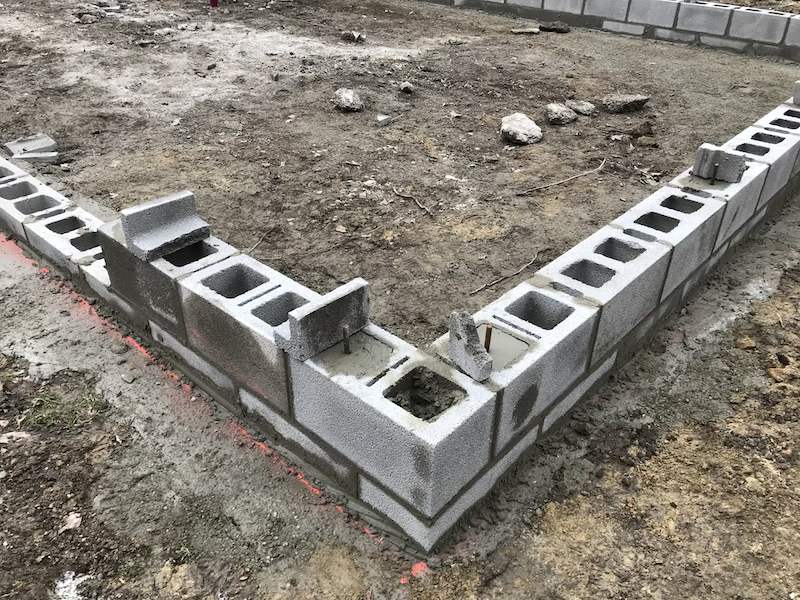
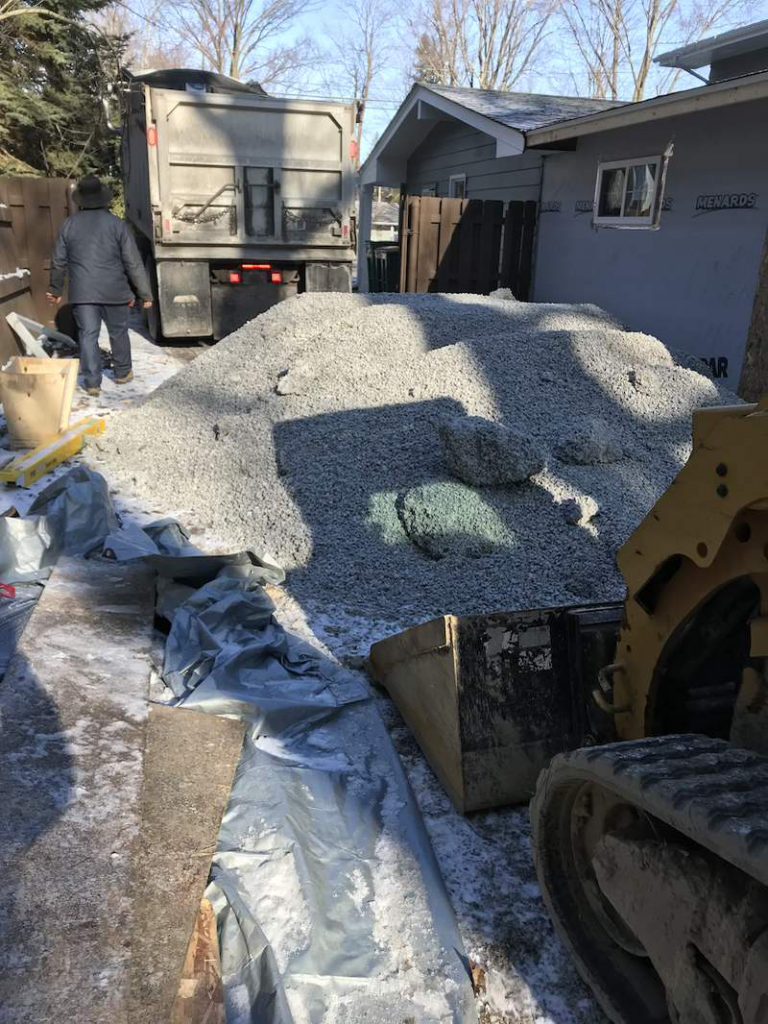
Step 2. Dig and pour the foundation
In some ways, this was the hardest part. I called multiple concrete contractors and couldn’t get a call back from most of them. I found this Amish man through another contact. He used his excavator to dig a 12″ wide trench footer, 36″ deep. He also set the foundation blocks.
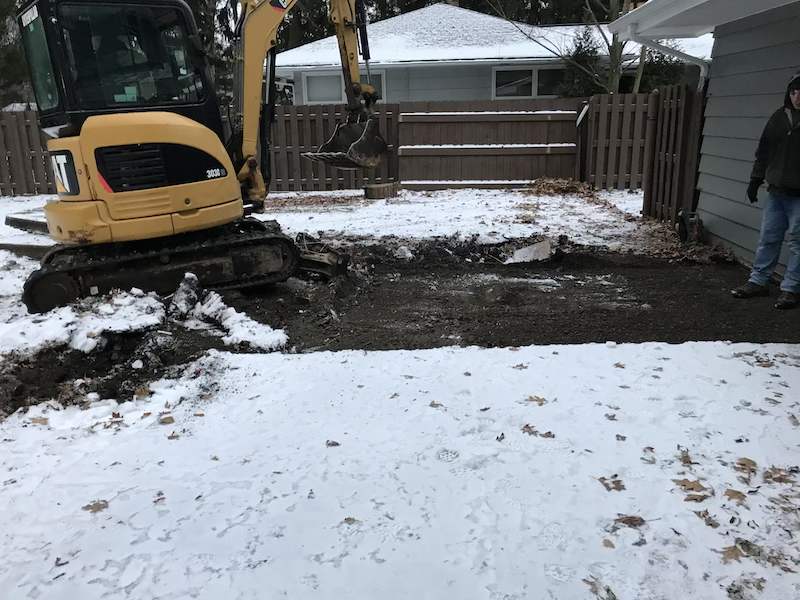
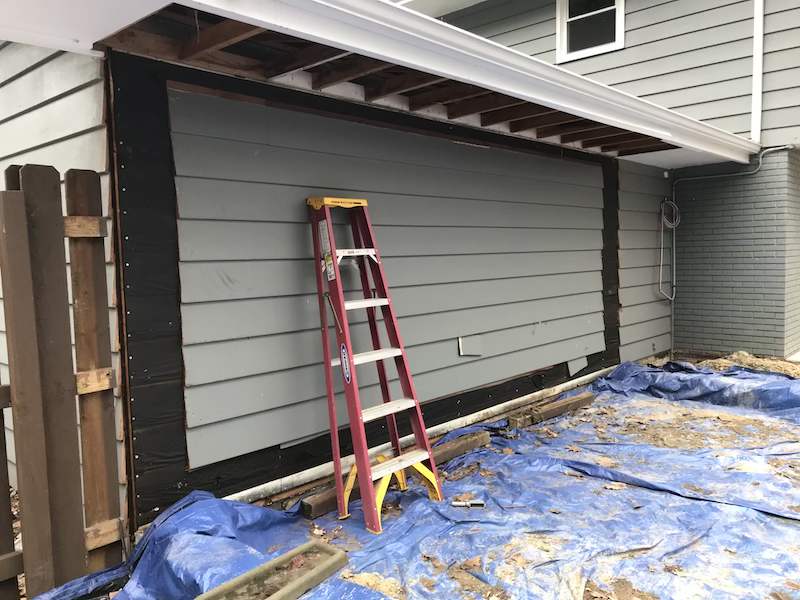
Step 3. Deconstruction
I had to remove part of the back of the garage to be ready for the carpenters.
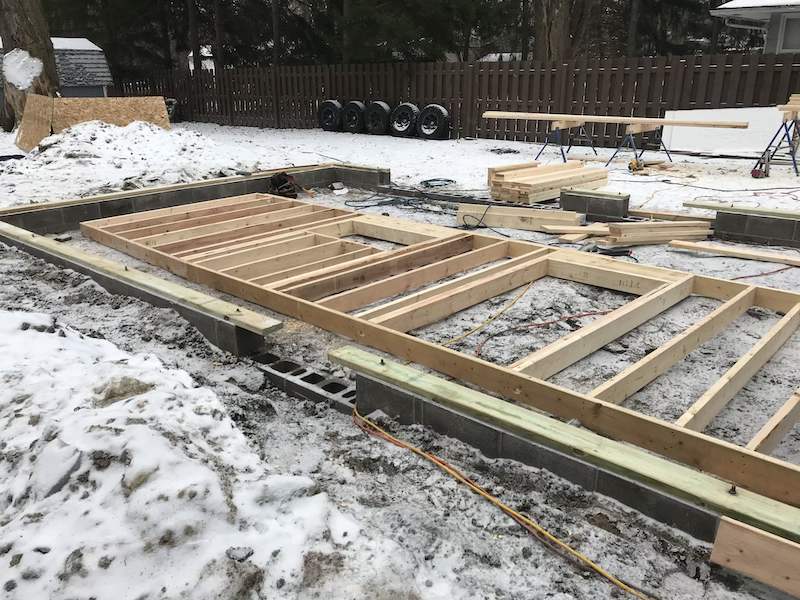
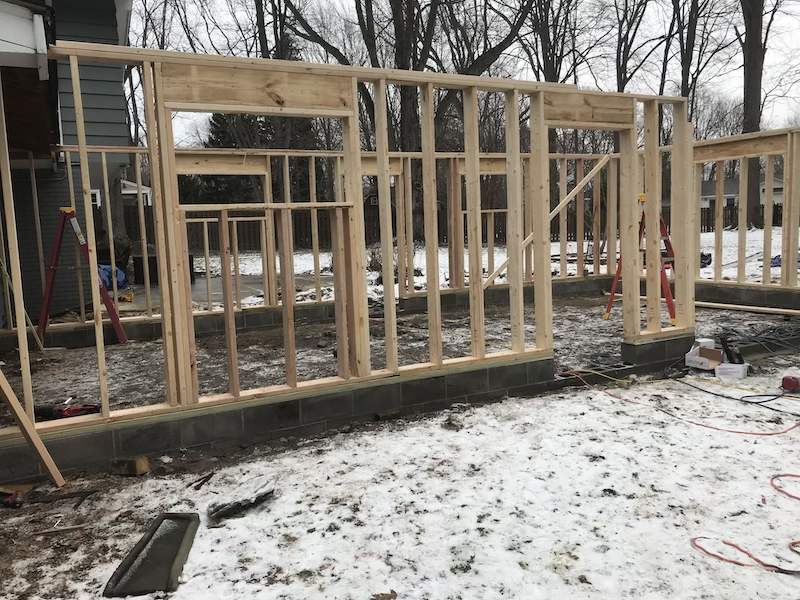
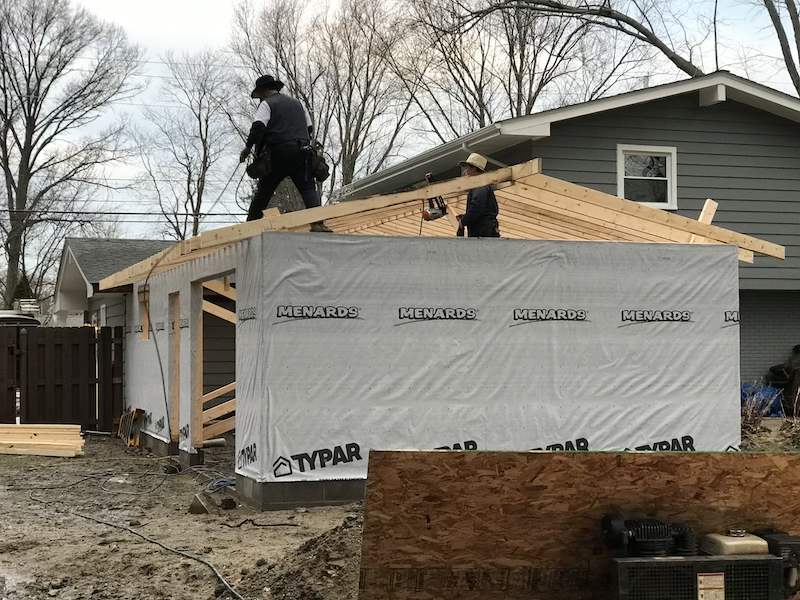
Step 4. Frame the main structure
I ordered all of the building materials from Menard’s and had it delivered. I’m a big fan of that store. Everything I bought, I made sure to wait until they had an 11% rebate sale going on. The lumber alone netted me $455 in rebates.
I used an Amish construction crew to frame the main structure. I have never seen a more efficiently working group of people before. All of the framing, sheathing and roofing was done in two and a half days by 3 men.
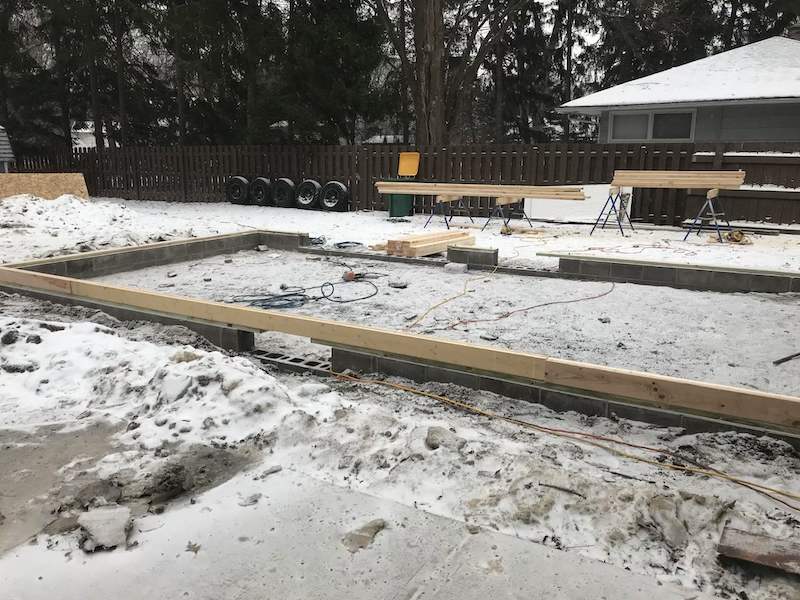

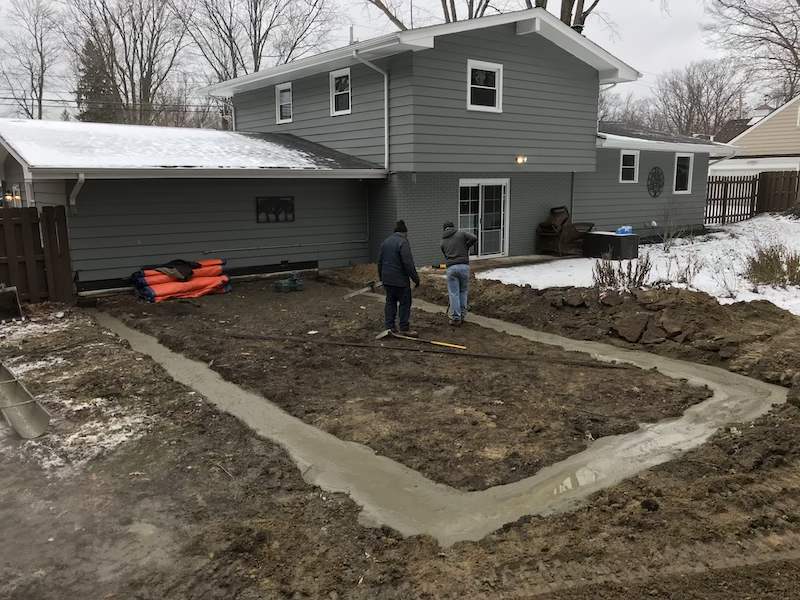
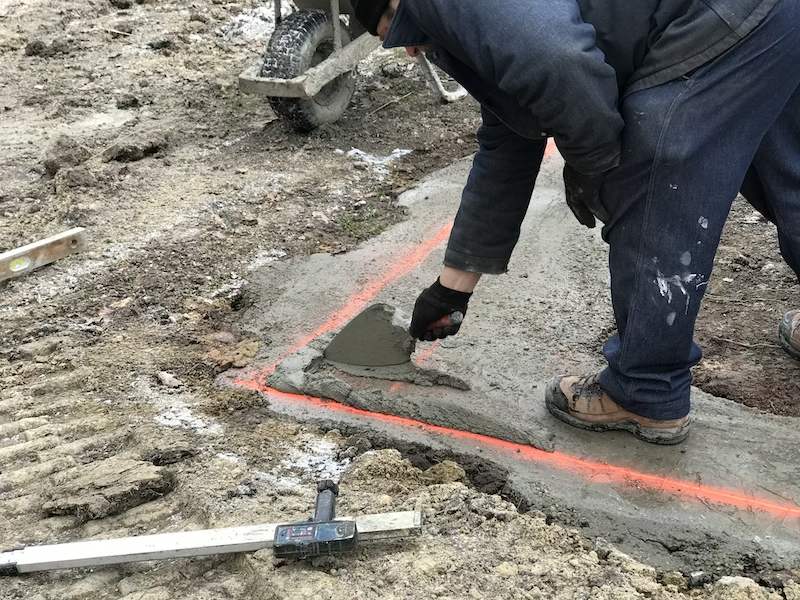
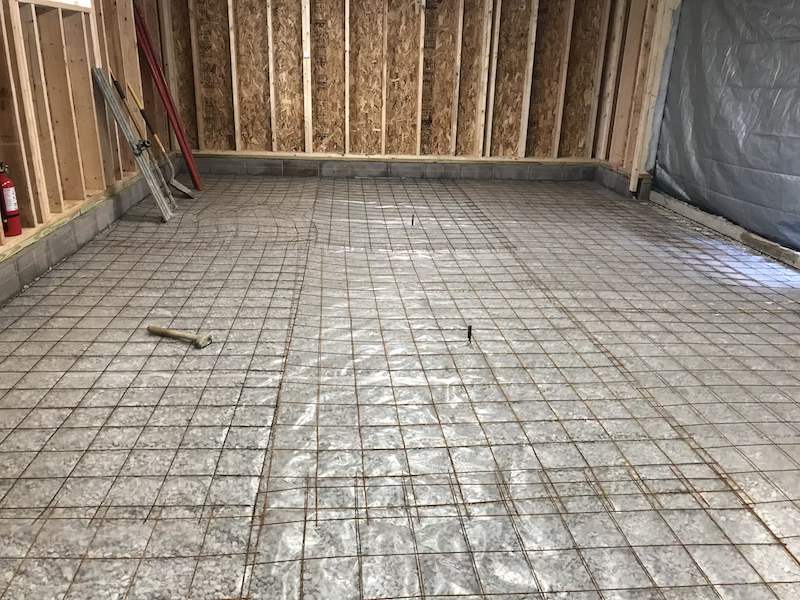
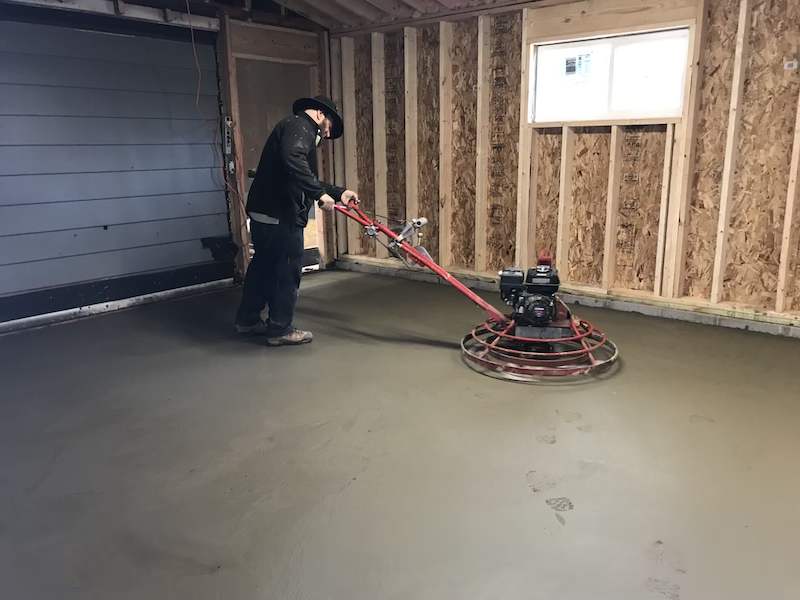
Step 5. Pour the pad
The Amish man that poured the footer came back and poured and finished the interior pad. Because it was so cold at this point, we needed the structure built in order to have some containment of heat for the pad concrete. I also ran a diesel torpedo heater over the weekend to keep it warm in the shop.
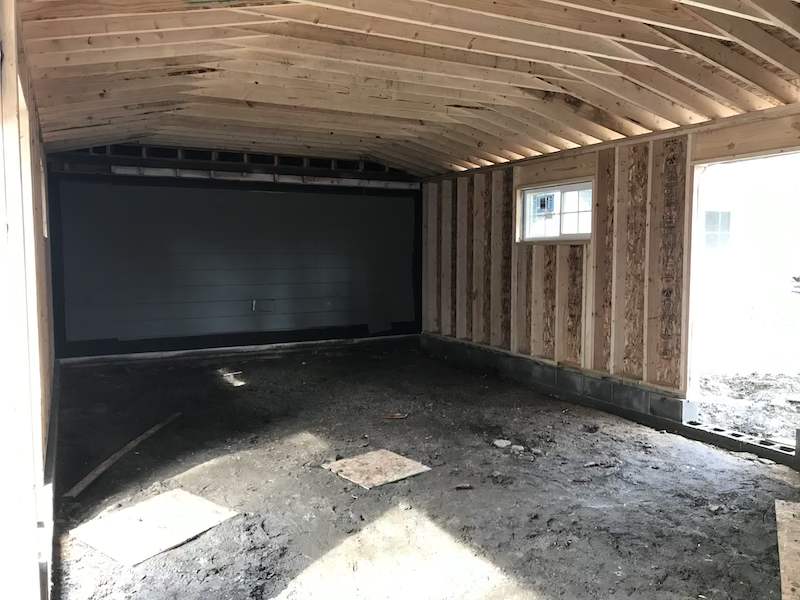
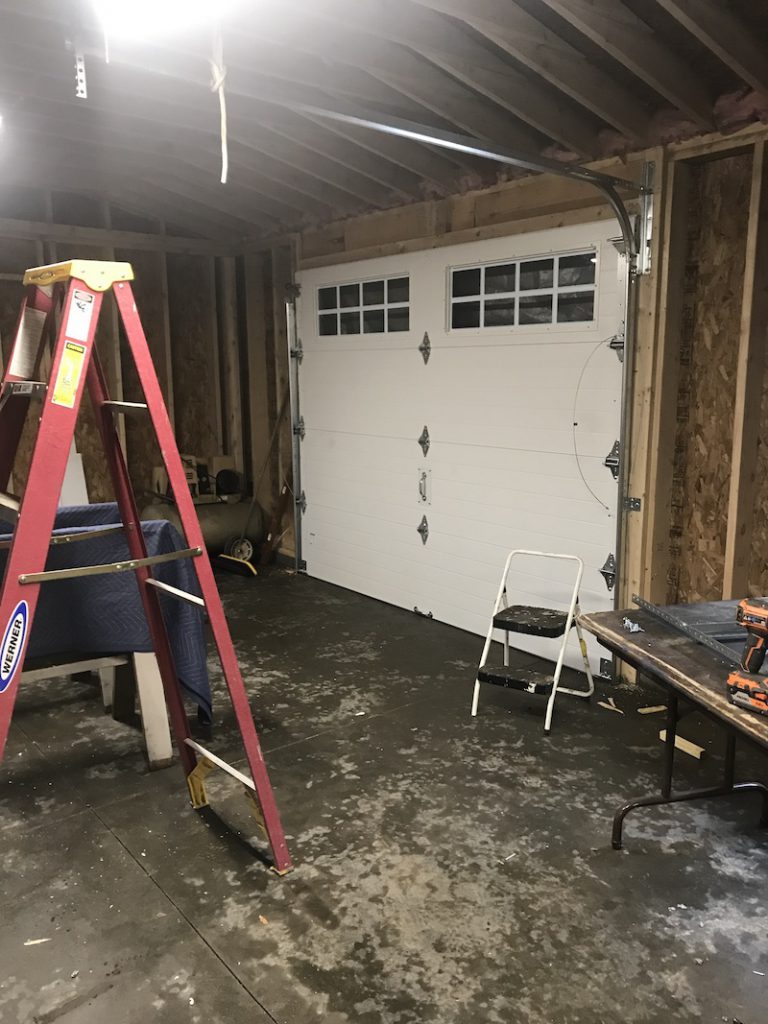
Step 6. Install doors
I installed the overhead garage door and the two walk doors with the help of a friend. The overhead door is insulated (R-12.9) and has a carriage door design. After all the rebates, it was practically free.
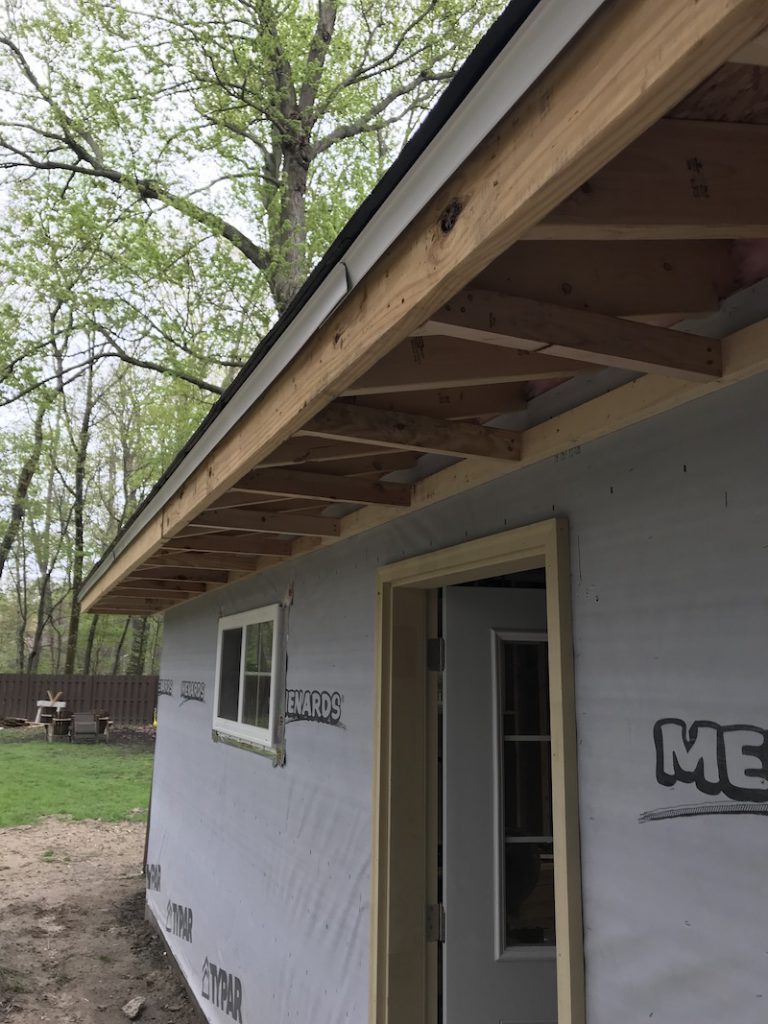
Step 7. Soffit and fascia
The carpenters left me with the rafter tails and the sub fascia. I needed to install the lookouts for the soffits, the soffit material and the fascia. For the soffits, I used Allura fiber cement vented soffit board. For the fascia and the overhead door trim, I used MiraTEC engineered wood. I love the wood grain look.

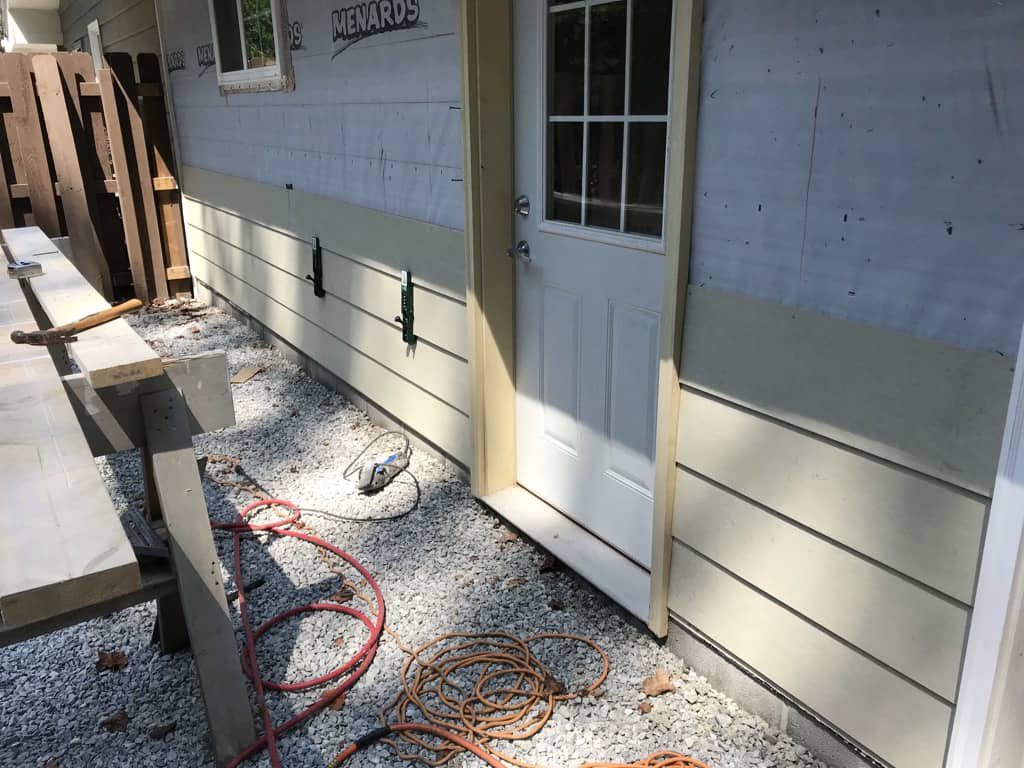
Step 8. Siding
The existing house is sided in 3/4″ cedar clapboards, with an 8″ exposure. Although I would have loved to use the same material, it was just cost prohibitive. I opted to use Allura fiber cement siding. It comes in a 9 1/4″ wide board, 12′ long. It’s fire rated and has a 50 year warranty. Plus, it’s about 1/2 the cost as cedar. Once I got the first course on with some help, I was able to finish the rest of it myself.
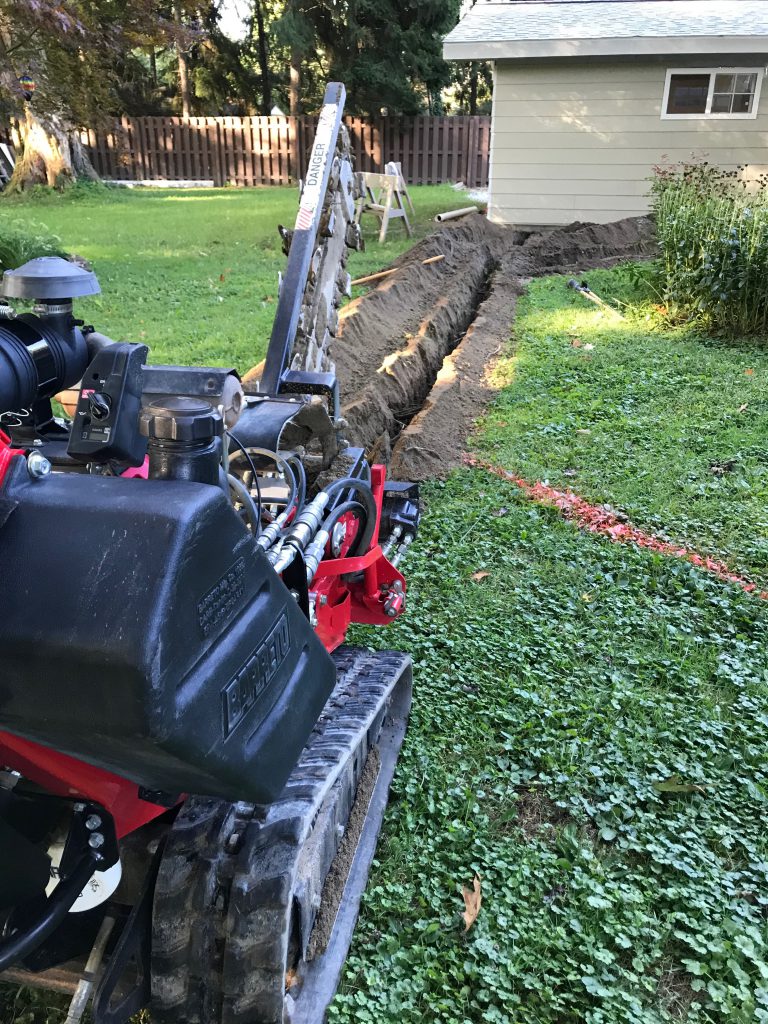
Step 9. Electrical
I rented a trencher to dig about 70′ of trench, 30″ deep to bury the feeder wire for the shop. There’s no way to get anything from inside the house to the shop. I wanted to have ample capacity, so I buried 2-2-2-4 aluminum which will be good up to 100 amps.
I also buried some 1/2″ conduit for a data line and a 1-1/2″ empty run of schedule 40 for a later run of a gas line for heat.


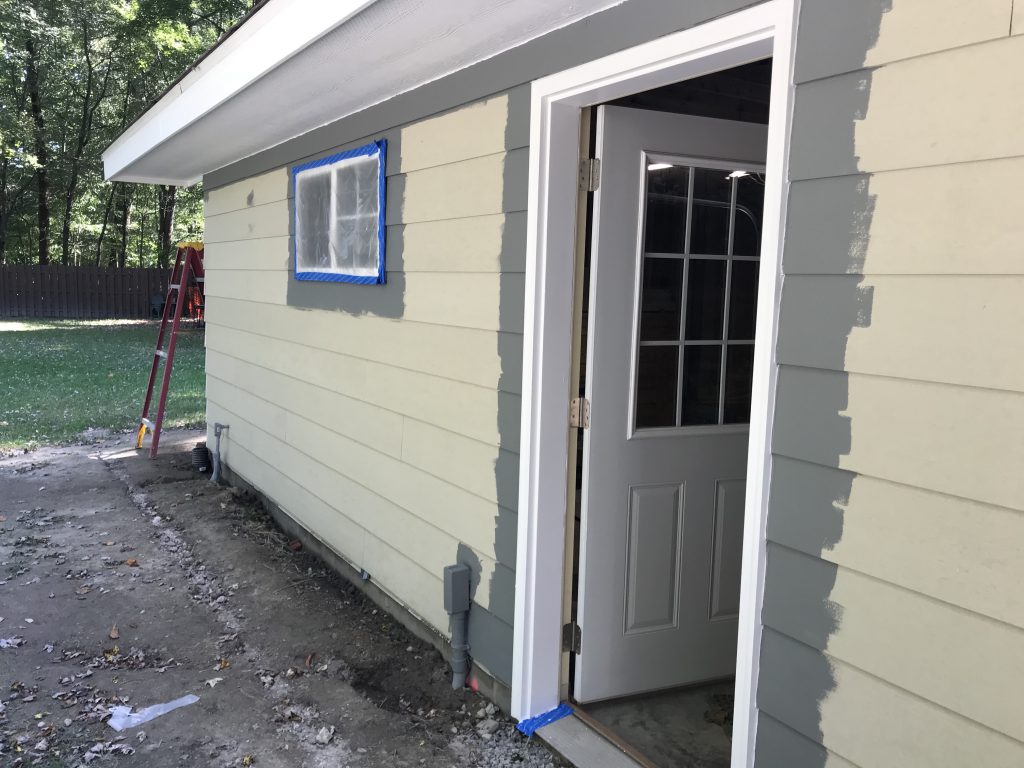
Step 10. Paint and gutters
The last thing to do was to paint the siding and trim and install the gutters. I used a roller for the soffit and fascia, brush painted the trim, but used an airless sprayer to paint the main body.
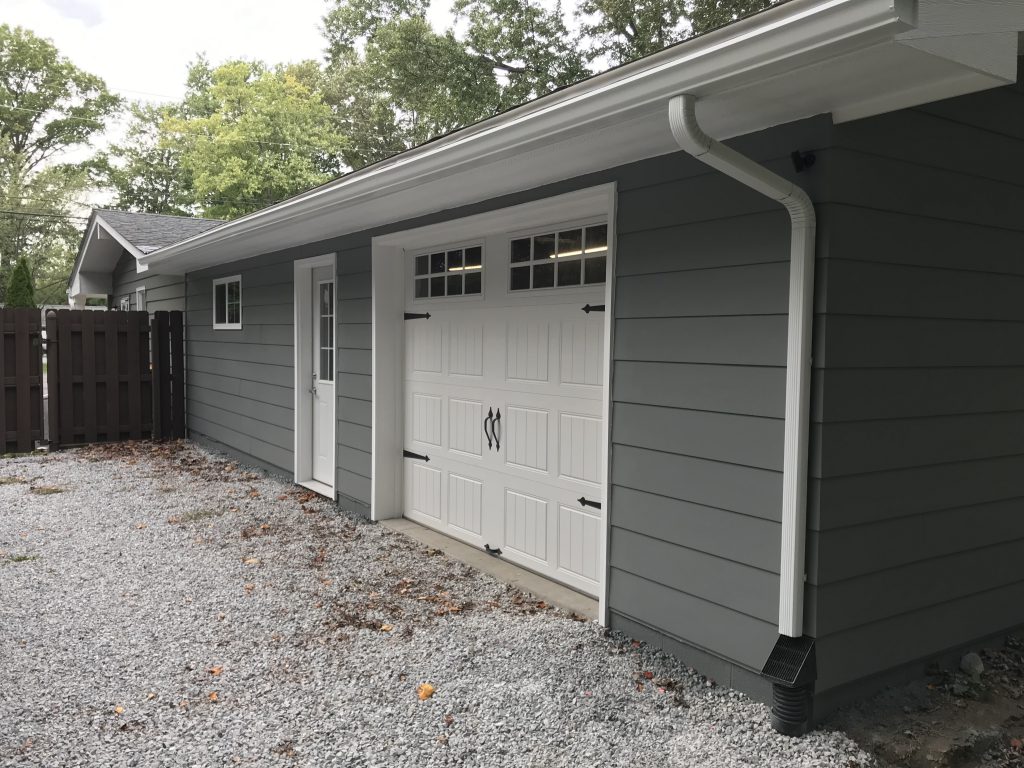
The finished project
I started the project in January and it’s now the end of September. I could have hired a contractor and let them coordinate everything for me, but I would have spent at least 50% more than I did by doing it myself. I wasn’t in a rush. I’ve been using the shop since the doors were put in, but I am happy now that it’s done.
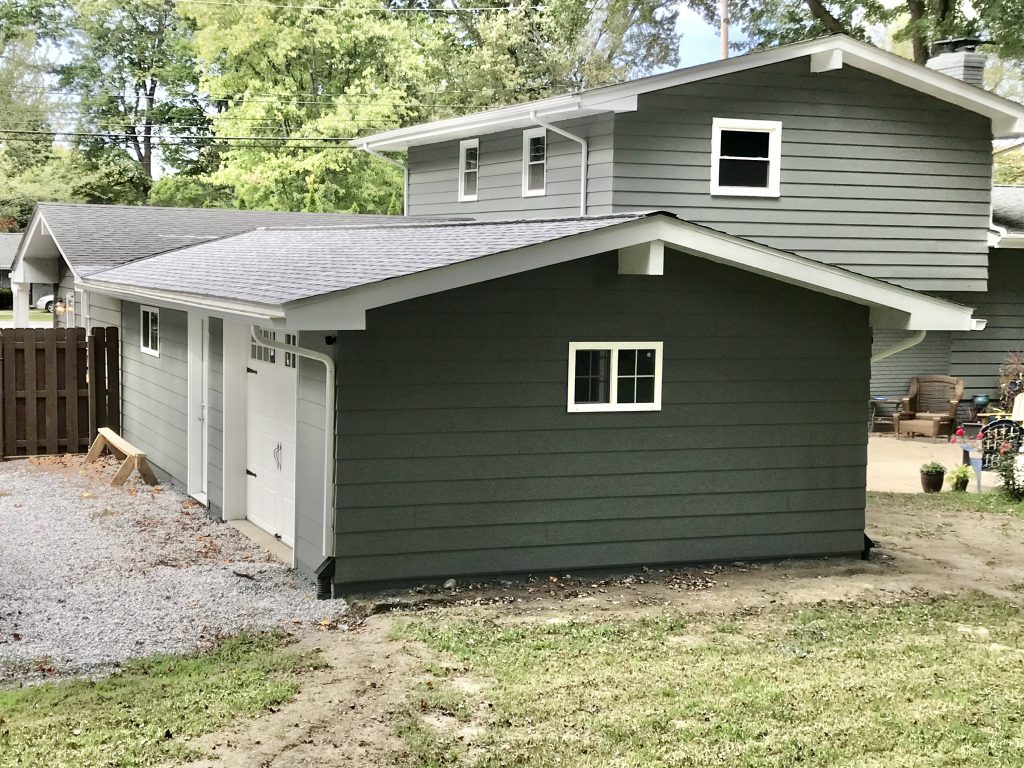
Next year, we’ll get some landscape design done. I also plan to do the electrical work inside, insulate it and put 3/4″ plywood on the walls. I am thinking about using a corrugated tin for the ceiling, or maybe interior barn siding. Still a lot to do, but it feels really good to see it like this.