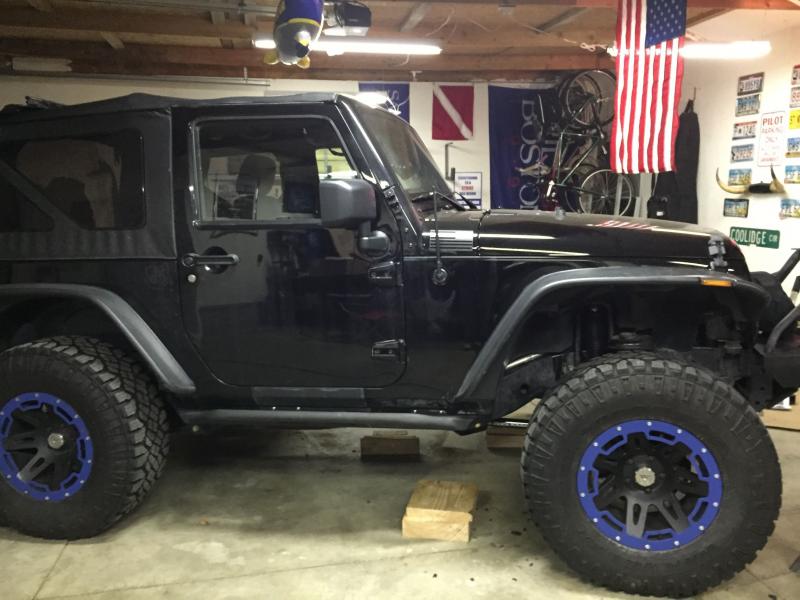
Early Christmas present came. My Rock Krawler 2.5″ X-Factor lift!
The adventures of a Jeep and its driver.
Early Christmas present came. My Rock Krawler 2.5″ X-Factor lift!

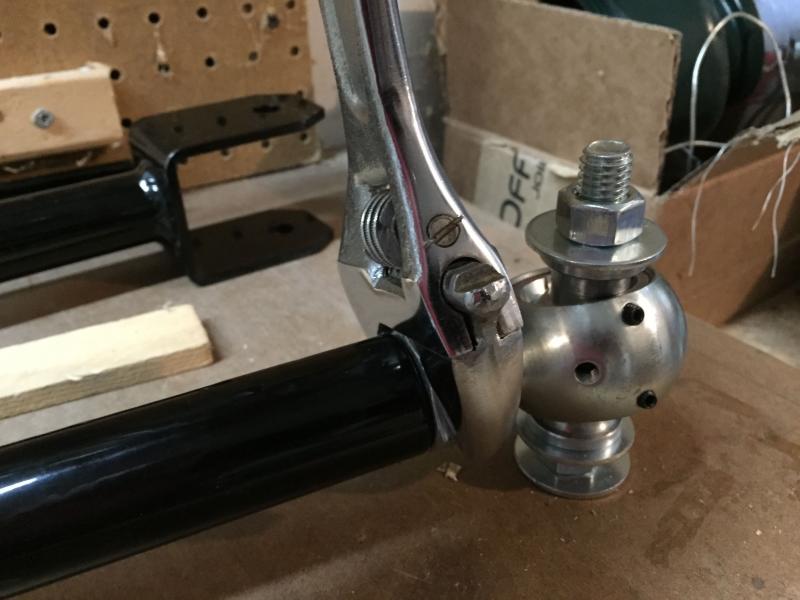
Spent the day trying to rig something up to help me set all of the control arms for my X-Factor lift to the proper length and to assist in torquing down the jam nuts. These jam nuts have to be torqued to well over 200 foot-pounds without misaligning the joints. Not sure if this will do the trick or not.

With the 35″ tires on the Jeep, I didn’t feel comfortable with the spare being on the tailgate. I’d rather not just delete the tailgate carrier and put the spare in the back since I do use the back of the Jeep from time to time.
JCR Offroad to the rescue!. Installed the JCR Shield Tire Carrier to carry the load.
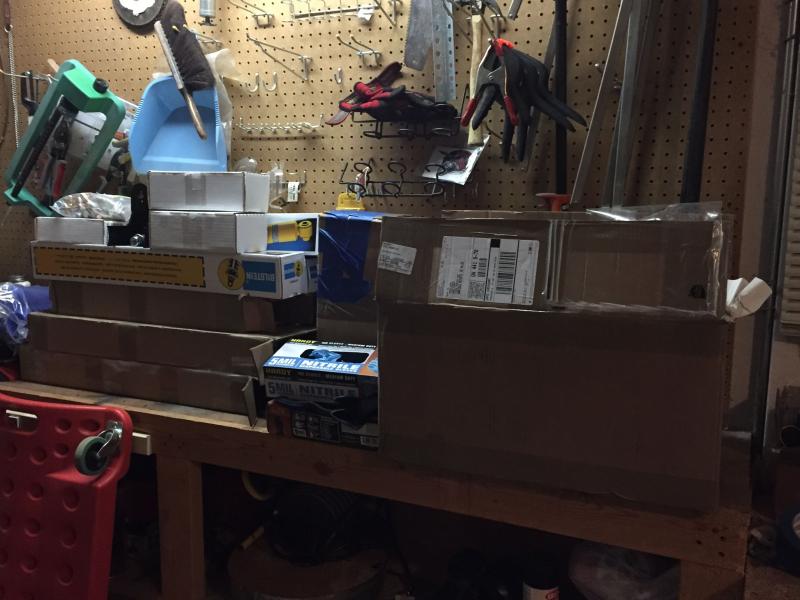
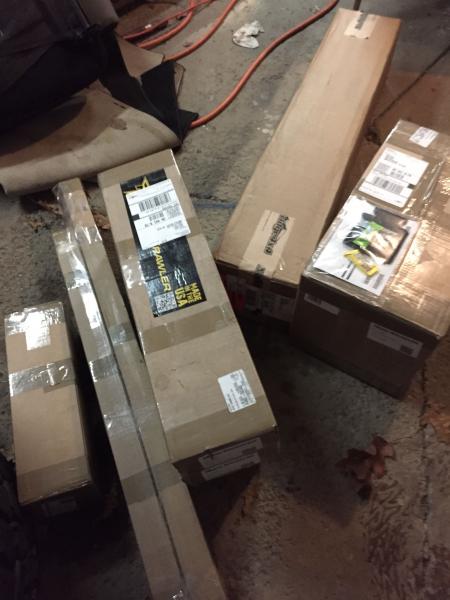
All the parts and some tools I need for the lift install are all organized and ready to get loaded into the Jeep. A friend volunteered his triple stall heated garage for the project.
December 21, 2014 – Lift install day one.
With the help of a few friends, I managed to get the front started.
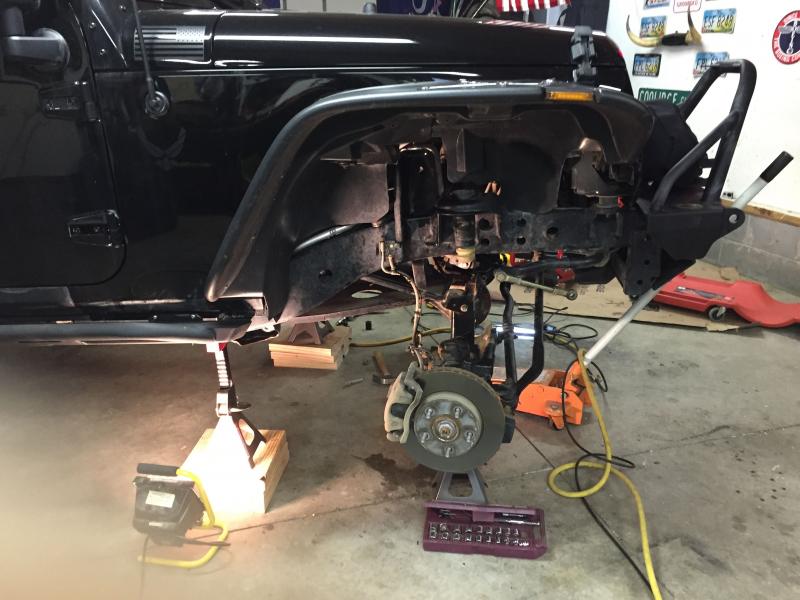
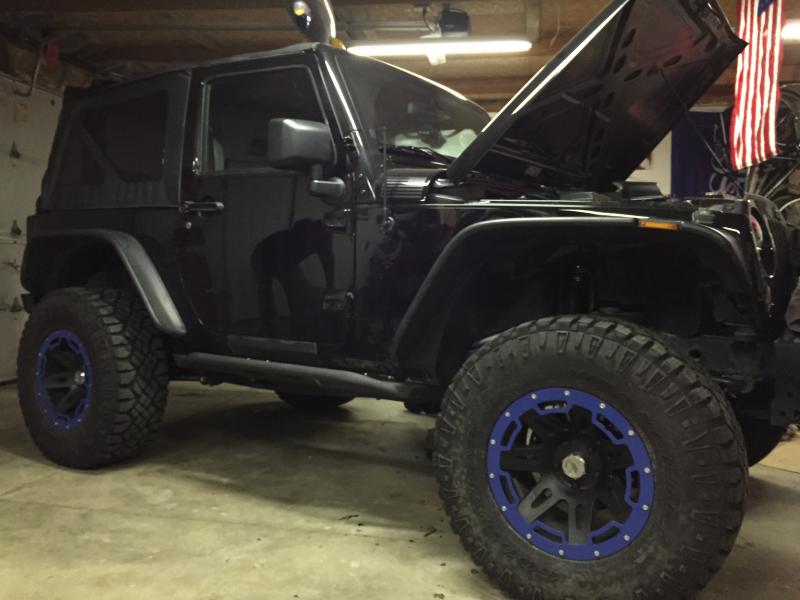
The Rock Krawler X-Factor lift includes both upper and lower control arms for the front and rear. The lowers contain a bend to provide a little more ground clearance. These things are heavy.

After about 8 hours, we got the front complete, plus the exhaust spacers from Tereflex I also picked up. Removing the exhaust bolts was a bear, but that was after we had to remove my engine skid to get to everything.
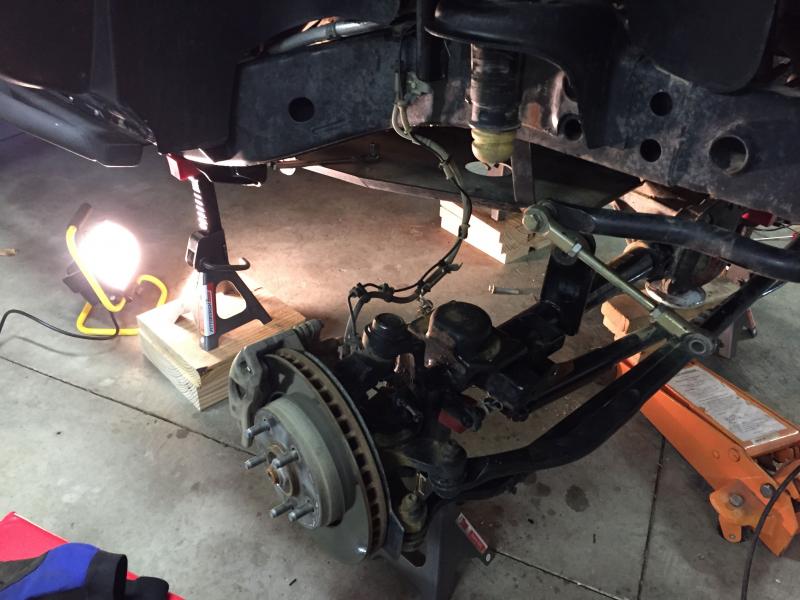

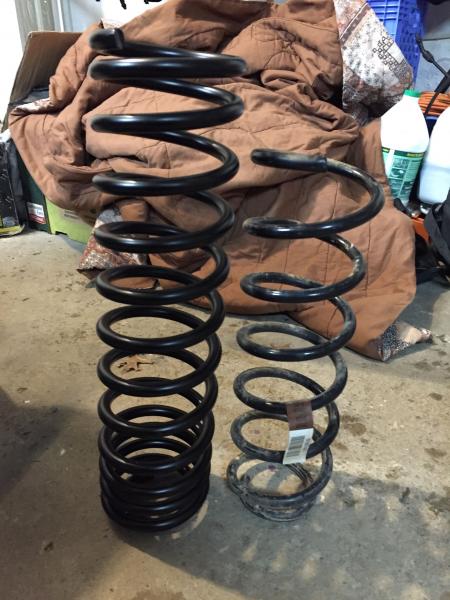
You can see the difference in the rear versus the front. This was after removing the front budget boost spacers and JKU springs. The rear still has a 1″ spacer and JKU springs.
A good friend was gracious enough to stop by and help finish the lift. He brought along these massive 6 ton jack stands that really raise the jeep up to where we need it to be. Day two was a full 12 hour day. We ran into a couple of issues that delayed a few things. Plus, once the lift was done and let the suspension settle, we had to torque all of the control arm bolts down to spec.


I had a friend’s GoPro set up on a 2 sec. time lapse to capture the lift. Turns out 2 seconds was too short of a duration as it filled up the memory card sometime during day two. But here’s the video I made from what I was able to use.
I made a couple of mistakes while installing my lift that I did not detail prior to this post. Neither of which make the Jeep underivable or unsafe. But my pride kept me from being public, but I decided it was more important to detail them here and hope that someone else can avoid making the same ones.
Mistake #1. Use the right sized bolt.
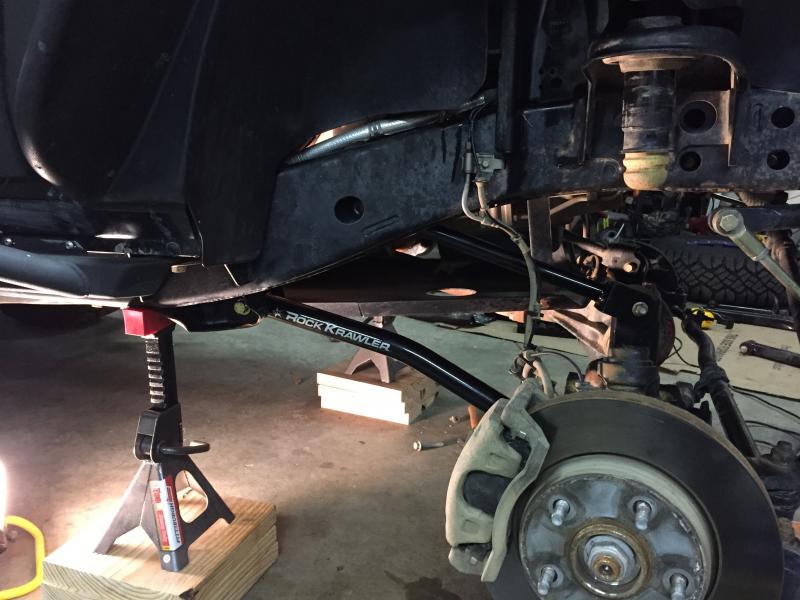
I bought the Northridge 4×4 Grade 8 hardware kit to go along with the lift. I wanted to use stronger hardware, plus be proactive in preventing any future death wobble. I assumed all of the 9/16″ bolts would be used. I did’t read the sheet that came with the Northridge kit completely to realize that there were 2 extra bolts that were 14mm, just slightly smaller than 9/16″ (14.3mm). Thinking that both front track bar bolts were the same, I used the 9/16″ bolts in both the frame and axle side holes. Little did I know, that the Rock Krawler flex joint has a 14mm bushing. Somehow, we managed to get the 9/16″ bolt into the bushing, but when I went to take the track bar back out, the bolt would not come out. It’s stuck and it is stuck good. Nothing we tried worked to get it out. I have a few ideas to try, some of which will destroy the rubber bushing and sleeve in the joint, but I have already received replacements for those from Rock Krawler. Once I get the bolt out and rebuild the joint, I am going to shave the extra .3mm from the joint bushing sleeve (making it 9/16″) and use a new 9/16″ bolt, since that’s the size of the frame side bracket.
Mistake #2. Trust your instincts, do what you know you should do, and don’t panic.
Part of the install process was to insert Tereflex exhaust spacers between the exhaust manifolds and the Y-Pipe. This pushes the exhaust cross over back about an inch or so, giving the drive shaft more space to droop. Even though the Jeep is only about a year and a half old, the bolts in the exhaust flange were a bear to get out. Ringer gave me a tip (after the fact when I asked him for some advice to fix my mistake chronicled below) of heating up the flange and using some PB Blaster on the bolt, reheating it and then getting a wrench on the bolt.
Once the exhaust was apart, the clamp on the Y-Pipe was nearly impossible to get loose. So I opted to just cut it off and replace it.
Once everything was apart, getting the Y-Pipe pushed back into the pipe leading to the catalytic converter was a challenge. I don’t think there’s enough room in the pipe before it’s diameter shrinks to do what the Tereflex instructions say. Well, I managed to get it partly back together, but nowhere near where it needed to be. One of the new flange bolts was barely in the flange and had probably another 3/8″ to go before fully seated. But it was in such a horrible location, there was no way I was going to be able to tighten this down with the corrosion in the threads of the flange nut. It was fine to drive, so I decided to tackle it another day.
When I had a free Saturday, I took the Jeep back down to Rob’s garage to button up the exhaust spacers and to put the skid plate back on. Another friend, Andy, had suggested using a tap to clean out the threads in the exhaust flange. It would make it easier to get the exhaust back together the right way. I started with the passenger side flange. Used an M8 x 1.25 tap and was able to clean out one of the two flange nuts. On to the other one. The whole time I am doing this, I didn’t even think about using some cutting oil as the first one was very easy to get through. The second one gave me a little resistance. My instincts told me to back out the tap, put some WD40 on the tap and go easy. “Oh, just another 1/4 turn and I’ll do that” was the thought I had. Trust your instincts. No sooner had that thought crossed my mind that the tap snapped off in the exhaust manifold.
I don’t recall the exact expletives I hurled at that point, but I imagine several were no more than 4 letters long. Now, the prudent thing would have been to calm down, relax, and think about the right solution to remove the broken tap. That would have been prudent, but that’s not what I did. I figured I would just drill out the tap some how. Yeah. Right. I think I broke 3 different drill bits. Had I stopped to think, I could have put some heat on the flange, expanding the steel, and using something to unthread the tap from the hole. Problem solved. But I didn’t do that and I ended up making the situation worse.
So now I have an exhaust that I still need to get back together, but I had to move forward. I used a new tap on the driver’s side, taking extra care and time on each flange nut. I think I spent 90 minutes on that side. I also removed the entire Y-Pipe and cut about an inch off the end the goes into the catalytic converter. Reinstalled everything, easily put the 3 bolts back into the manifolds that I could, and rigged some wire through the 4th hole to help keep it all together. No exhaust leaks, so it’s staying this way until it gets warmer.


My neighborhood mechanic thinks he can burn it out, even as close to the transmission lines as it is.
I also learned that the spacers push the exhaust cross over to below the transmission cross member. In order to reinstall my skid plate, I had to stack up an inch of washers and use a longer bolt to make sure the skid had room between it and the exhaust. Hit that too hard, and you’re cracking the manifold or worse. I am led to understand that the exhaust manifold is part of the cylinder head on the 3.6L and is a $350 dealer part.
I’m pissed at myself, and embarrassed, because I knew better, but was impatient, and did the wrong thing anyway. I can look back on this and sorta laugh. I didn’t blow up my engine and a wheel didn’t fall off. Life goes on.
Learn from my mistakes. Please.
Haven’t done much with the Jeep since it’s been cold up in these parts. So cold that I got tired of either jumping in a cold Jeep in the morning, or running out to start it, run back in to wait for it to warm up. I bought a remote start from Amazon.
This one came pre programmed for a Jeep Wrangler and included a range extender.

I had actually “installed” this a couple weeks ago. When I first got it, I plugged it in, programmed it for my key, and just left all the wires hanging there. I didn’t care. I was tired of being cold.
It took all of 10 minutes. After being sick for a week and dealing with Snowmagedon 2.5, I didn’t have time to finish the install.
Today, I spent a couple of hours zip tied everything up and ran wires from the unit to the wires under the fuse box for the parking lights. When the remote starter is active, it turns on the parking lights. I also mounted the antenna for the range extender to the windshield.
The range extender isn’t necessary, as pushing the lock button on the FOB three times activates the starter. I’m just out of range of that from my second floor office to the parking lot, thus the need for the range extender.
Considering I spent $150 on this, I give it very high marks. A Mopar unit is $225, plus you still need to have a dealer flash your computer (add another $100). So for less than half of “stock” this is way worth it.
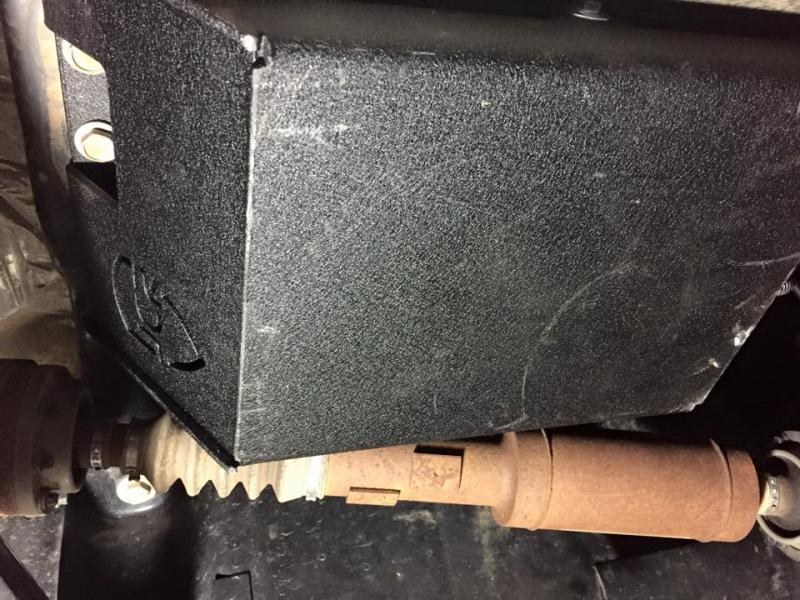
Installed a JCR Offroad Evap Skid. The instructions on their website seemed our of date. They made it sound like you left the old skid in place, which mad no sense to me. I got rid of the old skid. There’s not much to it, so I think I guessed right.
The hardest part was removing the connectors to the canister. There are these little U-clips on the hard lines that you have to pop out in order to remove them from the evap. I found a video on youtube that described it. Didn’t keep me from breaking one. Doh! No worries. It went back together OK and the two halves of the clip are holding the line on. I will replace them as soon as I can find a source.